
Table of Contents
Ever gazed up at the night sky and wondered just how those astonishingly beautiful photos of galaxies, nebulae, and star clusters are created? Well, it’s a magical marriage of astrophotography, science, and art. It demands both technical mastery and creative vision.
“Astrophotography: where the beauty of the night sky meets the precision of science and the creativity of art.”
From the technicalities of capturing light-year-away objects to the artistry required in post-processing images, astrophotography is a fascinating journey. A journey that seamlessly blends the accuracy of science with the free-flowing creativity of art, and I’m here to guide you through it!
The Artistic Side of Astrophotography
Astrophotography is a perfect marriage of science and art.
– Miguel Claro
I know how true this is because I have been working hard to create better images for the past few years. I normally use Photoshop for my artistic efforts to bring out the details hidden in my raw data.
Get a year’s subscription to Photoshop and bag a large discount here:

- 12-month discount subscription
- For Mac or PC
- New Generative AI
- Excellent tool which I use every day
I often use this example to explain to my friends how creative astrophotography is: If two people try to photograph the same target with the same equipment, the results will look very different. Why? Because there is a large artistic element in the creation of an astrophoto.
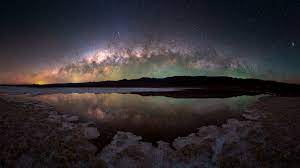
For example, creating wide-field shots of an astronomical target such as the Milky Way may involve adding a stunning landscape into the mix. The composition of the photo can create different emotional effects and complement the object in the sky.
Photographing the moon over a spooky landscape with an old church might evoke feelings of mystery. The Milky Way above a mountain range can create an amazing picture filled with grandeur.
In my opinion, it is not true to say that astrophotography creates fake photos. The colours are there, hidden in the raw photographs we take. We bring these colours out according to our tastes, and this is where we begin to get creative.
I always try to bring out the most detail I can without going too far. I don’t like very bright, saturated colours, which to me look unreal. I prefer more natural colours, so I tone them down a little. I have seen so many astrophotographers go too far with over-saturated reds, blues, yellows, and oranges.
Astrophotography science and art is a fine balance between realism and creativity. By editing in different ways, we can emphasise the details of an object. If we enhance the red colour, for example, we highlight areas of a nebula that have hydrogen alpha gases. This can also be done using an HA filter.
It is also possible to use different colour palettes to enhance the features of a deep sky object, as the Hubble Telescope does when using the Hubble palette.
In astrophotography, we create representations of reality with a large slice of artistic licence! If there was no creative element, I don’t think I would like this so much.
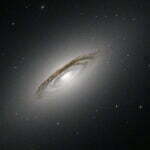
For instance, here are two images of the Orion Nebula:
Image 1:
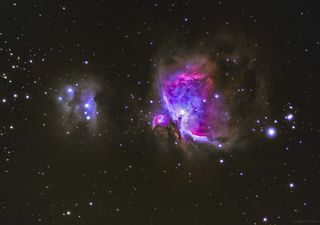
In the captivating landscapes of Serra de Aire, Portugal, close to the mystical Mira de Aire Caves complex. That’s where Miguel Claro, armed with his portable Vixen Polarie Star Tracker Mount, a Canon 60Da camera, and an Astro Professional ED 80 telescope, crafted this stunning image. (Image credit: Miguel Claro)
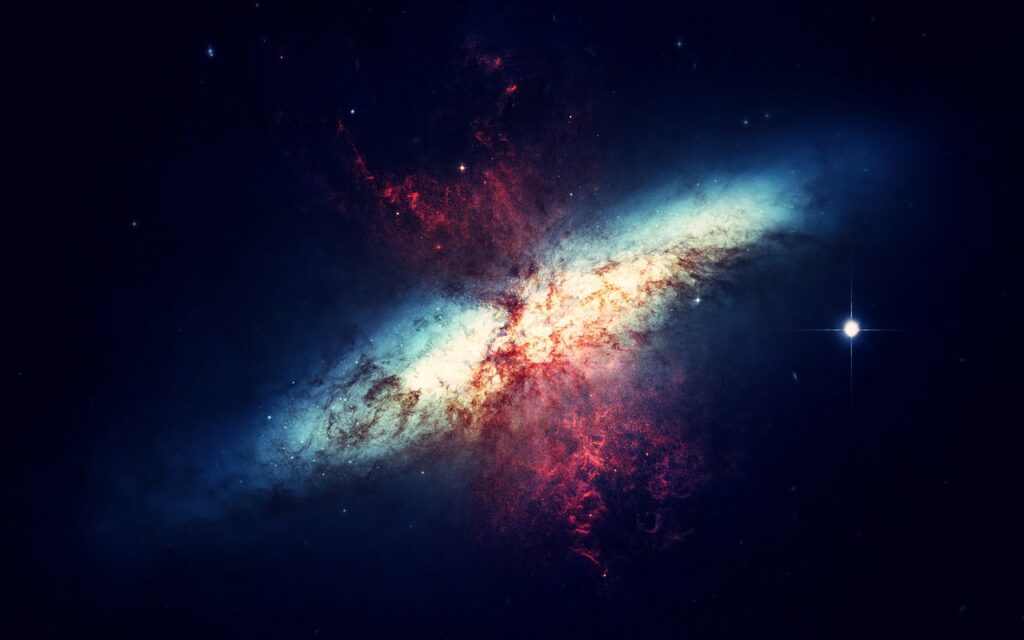
Image 2:
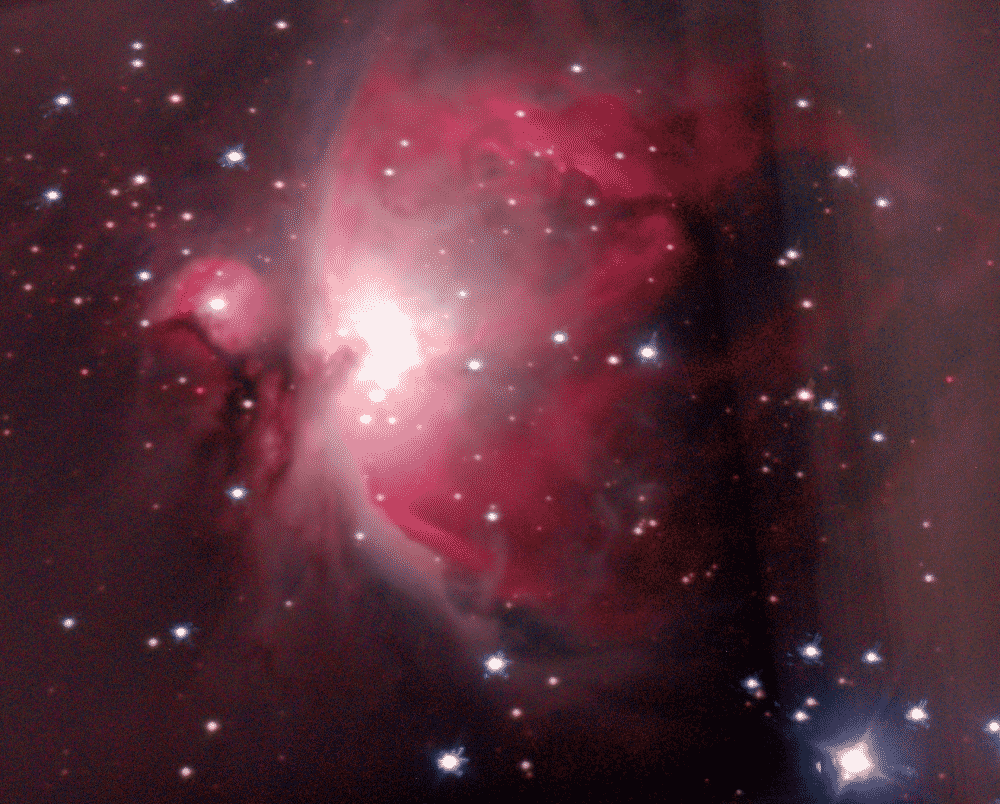
This was an image I took in 2021, and now I can see how blown out the core was. But apart from that, I was pleased with the image at that stage of my astro journey. Look at the colours. Very understated. I was mainly going for detail in this picture rather than trying to get the most vivid colours.
The Science of Capturing Light in Astrophotography
The secret of how we create such amazing astrophotos lies in the science of light! Astrophotography is a game of chasing photons, the tiny particles of light that journey from distant celestial bodies to your camera’s sensor.
Ever since I first started trying to take photos of the night sky, I’ve been blown away by the fact that the light I am capturing has come from thousands or even millions of light years away! I can’t believe I am looking back in time at what my target looked like in the distant past. It’s incredible!
Long Exposure is the key term here. This technique allows the camera to soak up more light, unveiling the wonders hidden in the inky blackness of the night sky. It’s like leaving a bucket out to catch rain – the longer you leave it, the more it collects. Only here is your bucket: the camera sensor is collecting light particles.
But wait, what about the movement of the Earth? Surely that must blur the stars, right? This is where the genius of tracking mounts comes into play. These devices follow the stars’ path across the sky, counteracting Earth’s rotation and keeping your target steady.
Remember, capturing the perfect astrophoto is a dance between your camera, the night sky, and the earth itself.
Beyond the mechanics, there’s the matter of camera settings. ISO, aperture, and shutter speed are all vital in astrophotography. Mastering these settings, understanding how they interact, and customising them to the conditions of the night sky are crucial steps in getting that perfect shot.
Astrophotography science and art perfectly balanced. This is the essence of the best astronomical photos.
Choosing the Right Gear for Astrophotography
The equipment that you use for astrophotography will have a huge impact on the quality of your images. This is why it’s important to choose wisely so that you can take the best possible images for the level you are at. It is important that the gear you choose is also practical and will enable you to learn how to be a better astrophotographer.
I would caution you against buying without doing research first and being clear about your current level of experience. It’s also important to know what you want to focus on. Are you interested in deep-sky objects or planets? Do you want to photograph up close with a telescope or wide-field with a camera and lens?
I found that at the start, it’s a good idea not to spend too much and to buy easy-to-use equipment. You can then upgrade later, when you have the skill and knowledge to use more complex and advanced gear.
I started with a low-budget Celestron 130slt Goto telescope. It had an alt-az mount, which was very simple to use. I tried taking photos of planets like Mars, Jupiter, and Saturn and took some shots of the moon. This got me started and taught me the basics of using a telescope and DSLR camera.
I need to mention, though, that the Celestron 130slt and many other telescopes are not designed for astrophotography. It is necessary to move the position of the mirror forward to reach focus. There are solutions to this, including this non-destructive and reversible method to modify a reflector telescope to enable a camera to reach focus.
I then jumped to an equatorial mount but kept my reflector telescope OTA (optical telescope assembly, just the telescope tube part). This was a huge jump and forced me to learn Polar Alignment and other techniques. My images are now many times better and look more professional.
Here are three fantastic equatorial mounts with Goto you should consider using:


- 44 pounds capacity load
- Accurate Goto
- Includes polar scope
- portable

- Complete kit plus tripod
- Wifi control
- Astrophotography on the go!
- Polar scope included
So take it in steps that take you ever upward. Astrophotography involves a steep learning curve, but there is no need to make it too difficult. Choosing the wrong equipment is costly and very frustrating! I’ve experienced that frustration, and it is no fun!
In essence, the equipment you need for your astrophotography setup will include:
- A telescope mount or star tracker
- A camera (DSLR or electronic Astro camera)
- Filters
- A laptop or PC (not necessary when you start astrophotography)
That’s it. Buying the best you can afford is another good tip. You’ll be happier with the result, and the equipment will last longer. Cutting corners is never a good idea in astrophotography, but there are opportunities to do some DIY. For example, I 3D printed parts to modify the position of my primary mirror for prime focus, and I 3D printed a Bahtinov Mask for accurate focus.
Mastering Astrophotography Science and Art Techniques and Settings
You’ll need to understand basic photography before you can get the hang of astrophotography science and art. If you use a DSLR camera, you’ll need to be good at using manual settings. The most important camera settings are the ISO setting, the shutter speed for objects such as planets or the moon, accurate focus and adjustments on the lens such as the F value.
For more about the correct settings for astrophotography click here. I’m sure this will help you master it.
It is being able to select the correct shutter speed or exposure time, the correct ISO or gain (for an electronic camera), and understanding things like the focal ratio and focal length of lenses and optics.
I had to learn this when I started, as my photography knowledge was limited. I didn’t find it very difficult to learn and master this, so I don’t see why you should have too much difficulty. Reading and practice are the answers.
How to Edit and Enhance Your Astrophotos
As I said, I use Photoshop, but there are many choices for software you can use to edit and enhance your images. Learn more about the choice of astrophotography software here.
There are several techniques I recommend to enhance your astrophotos:
- Do a series of curve stretches to bring out the details. I use the arcsine stretch tool for this. Makes it even easier.
- Pay attention to your levels so that you get the background as black as you think looks best. Many people make the background very black, but I prefer a lighter background, which reveals some of the hidden details around the object I am editing.
- I like to use the clarity and saturation sliders in Photoshop. Clarity does what it says; it makes your image sharper and clearer. Saturation enhances the colour present in your image.
- Make sure that you edit your astrophotos in raw format or as a.tif file. There is much more information in these larger files, which improves the possibility of bringing out the details.
- Something that has helped me improve my images further is to remove the stars early in my editing workflow. I use StarXterminator for this. It’s a brilliant program! This creates an image without stars that I can stretch and play with without spoiling the look of the stars.
- I have also found NoiseXterminator to be the best program I have tried for removing noise and keeping details. Try it!
- I love the local contrast enhancement action in astronomy tools by ProDigital Software. It makes the details look great!
The Importance of Patience and Perseverance in Astrophotography
One thing an astrophotographer needs is patience! There is a lot of time involved in taking many astrophotos and setting things up. Sometimes things go wrong, and a bit of problem-solving is needed.
Your patience will always be rewarded. Sometimes we need patience in waiting for the weather conditions to allow us to do astrophotography. Depending on where you live, this may require waiting for weeks or more for the right conditions.
Don’t give up! The skies eventually clear.
Astrophotography Inspiration: Famous Astrophotographers and Their Works
Astrophotography, a merger of astronomical science and photographic art, has birthed some of the most awe-inspiring images known to man.
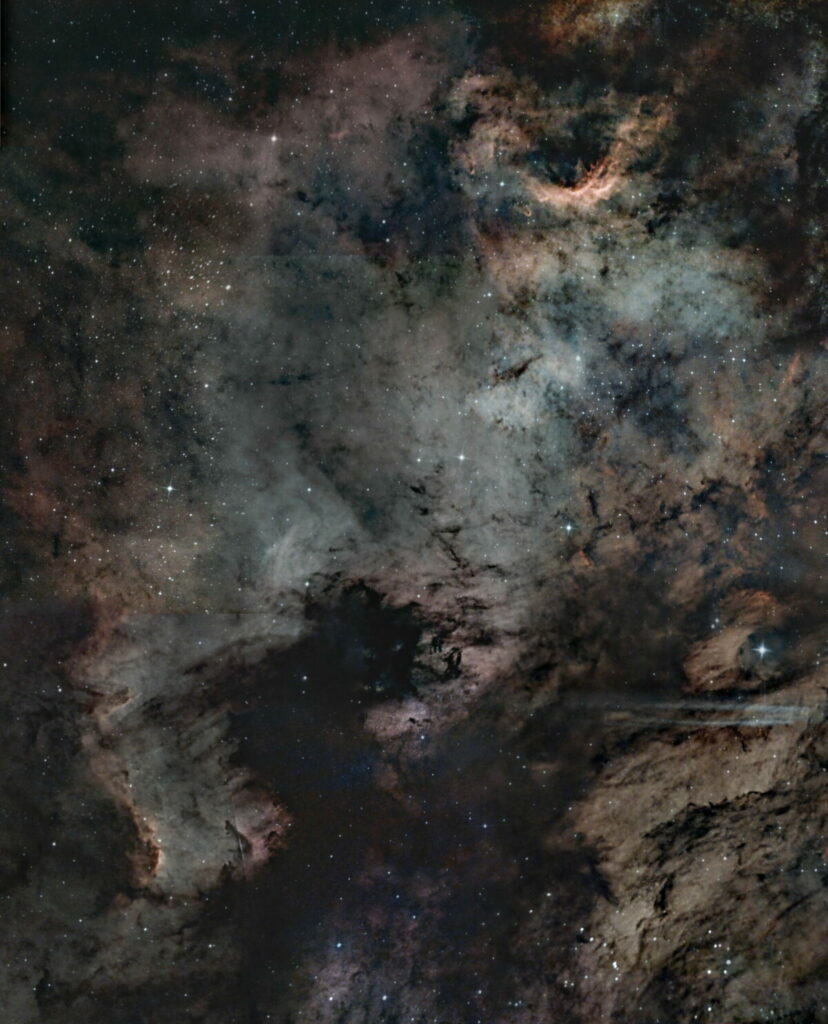
Here are some examples of astro art (including one of mine):
Astrophotography is more than just pretty images, though! It is an important source of research and can educate and inspire. The contribution of some of the astrophotographers who follow should not be underestimated.
- Robert Gendler: A renowned amateur astrophotographer, Gendler is known for his breathtakingly detailed images of deep space. His most famous image, The Horsehead Nebula, is a testament to his talent.
- David Malin: Malin’s revolutionary work in astronomical photography has earned him a distinguished reputation. His notable image, The Large Magellanic Cloud, showcases his unique ability to bring the depths of the cosmos to life.
- Hubble Space Telescope: Not a person, but certainly a significant contributor to astrophotography science and art. The Hubble has captured countless stunning images, including the iconic Pillars of Creation image of the Eagle Nebula.
- Michael Benson: Benson is celebrated for his work presenting space through photographs and cinema. His well-known image, Jupiter’s Great Red Spot, lucidly demonstrates his artistic interpretation of the universe.
- Alan Friedman: A master of solar photography, Friedman captures mesmerising images of our very own star. His noted image, The Surface of the Sun, offers an incredibly intimate look at the familiar solar sphere.
In conclusion, Astrophotography Science and Art
As we have seen, astrophotography requires knowledge of both science and art. As an astrophotographer, you have two sets of challenges to master. The first is technical, and the second is artistic. I don’t know which is more important because the technical aspect will improve your images. Perhaps it is the artistic element that makes an astrophoto truly stand out. What do you think? Drop a comment below and tell me.


