
Table of Contents
You may be a bit confused about what equipment you need exactly for astrophotography and how these fit together into a good setup. I have written this post to help you figure out which of these astrophotography setups is for you.
If you have already taken your first astrophotos, perhaps of the Milky Way or the Moon, for example, then you might be thinking of getting yourself the right gear to take your next step into this wonderful adventure that we call astrophotography. Either way, I’m here with this guide to astrophotography setups so that you’ll know what you need and how to put it together.
What are the essential elements of astrophotography setups?
The different parts that make up astrophotography setups include:
- A camera—a DSLR or electronic astro camera
- A remote shutter operator or intervalometer is used with DSLR cameras
- A tripod must be sturdy and able to support the weight of your gear
- A telescope—not everybody uses one, as this can be replaced with a lens on a camera
- A polar scope is only necessary with an equatorial mount
- A guide scope and camera—an extra that allows longer exposures
- A mount to track the movement of the stars
- Filters: to help you improve your images or to block out light pollution
- Eyepeices: for viewing objects in space
- A laptop is not necessary but commonly used for plate-solving, guiding, etc.
That’s just about it. There are lots of different gear, and they need to be connected correctly in such a way that everything is secured and does not move, as any small movement in your system can cause problems in your images.
Can I capture deep-sky objects with a beginner-level astrophotography setup?
Yes. When I started, I had just a simple DSLR camera and a basic lens with a lightweight tripod. It didn’t cost very much, and I was able to get started taking pictures of the moon, planets, and the Milky Way.
When I first tried to photograph a deep-sky object, I ran into problems but did manage to take my first images. They were very basic and not so great, but at the time, I was thrilled with the results!
In astrophotography, you can start with a basic setup. What kind of setup would that be?
I began with this setup:
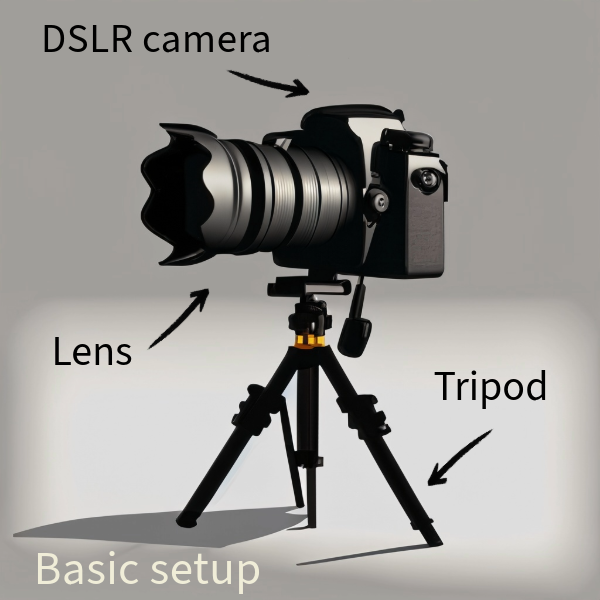
In my case, I used a Canon 600D camera with a basic lens that came with the camera. I also used a cheap tripod, which I already had. Nothing fancy and a cheap setup at about $300. Believe me, in astrophotography, this is very cheap!
As you progress, you can still use this basic setup, but you will want to upgrade the camera, get it modified for astrophotography so that it is more sensitive to hydrogen alpha, and you’ll want a good-quality tripod.
Clicking on any of the links above will take you to helpful information I’ve put together, which should help you understand what you need in a camera, tripod, and lens for astrophotography.

- Great for astrophotography
- 24.3 MP resolution
- Great value – approx. $630 (price may change)
- High quality 16-55mm lens
Choosing the Right Camera for Astrophotography
As you can understand, the choice of camera for astrophotography is very important. The first camera that many of us use in astrophotography is a DSLR, and that is a good choice. In many types of astrophotography, it is still the preferred choice, for example, wide-field landscape and Milky Way photography.
I took the path of many astrophotographers and focused on photographing deep-sky objects, which are very challenging to capture and require long exposures and often a telescope. After a while, I switched from my DSLR camera to the ZWO ASI533MCPRO, an astronomy camera, and I was astounded by the improvement!
In other words, two obvious choices depend on what targets you want to capture and the level of astrophotography you have reached:
- a DSLR camera, such as ones made by Canon, Nikon, Sony, etc.
- a dedicated astrophotography camera made by ZWO, SVBony, QHY, etc.

- 24.1 MP resolution
- Built-in Wi-Fi
- 1080p video
- 18-55mm and 75-300mm lenses
- Approx. $600
What are the benefits of using a dedicated astrophotography camera?
I have discussed this in more detail on this page, so there is no need to repeat what I have said, but basically, it comes down to the quality and sensitivity specifically designed for astrophotography. Although a DSLR can be a good choice, I found that the quality was limited, and I had to switch to get better images of deep-sky objects in less time than was possible with my DSLR.
I have also gone into detail on other pages about the problems with noise I faced with my DSLR camera in the summer. In short, because many astronomy cameras can be cooled, noise is reduced, and your images improve. It also becomes much easier to process your images.
The cooling in the camera I use, the ZWO ASI533 MCPRO, enables me to take pictures at a consistent temperature, which I set to zero degrees, and this doesn’t change no matter how hot it gets outside. This means I can also use consistent dark calibration frames if I want to.
Here is an excellent choice for astrophotgraphy:

- TEC cooled camera
- 11.7 MP CMOS
- With WIFI
- Minimizes noise
- Great value approx. $730 (price may change)
Do I need a telescope for astrophotography?
No, you don’t. It is possible to use the basic setup above or to use a telephoto lens or widefeild lens, depending on your astronomy target. For deep-sky objects, I use a telescope with a focal length of 650 mm, which is convenient for most objects except those that are too small (some galaxies and planetary nebulae) and those that are too large (for example, the North American Nebula, which I had to image with many separate images put together to form an astrophotography mosaic).
So, a telescope can be replaced with a good-quality lens that has the focal length that a telescope would have. Doing research, though, it appears to me that a telescope is a cheaper option, as you can see below:
Astrophotography Setups: The Telescope Setup
Comparing Different Types of Telescopes for Astrophotography
I won’t go into too much detail here but instead refer you to other pages I have written about which kinds of telescopes are the best to use for astrophotography. You can find out which telescope might be best for you by clicking on the links above.
Just a quick summary here: you can use reflectors, refractors, and certain other kinds of telescopes of different focal lengths. Reflectors are very popular because they are generally cheaper and do the job well. One downside is that they require regular collaboration, but that is not difficult to learn. I bought a laser collimator tool and collimate my telescope every few days.
Refractors, especially smaller ones, are widely used, but they suffer from distortion if the optics are not good. For this reason, they are generally not cheap. Larger refractors also get very heavy!
Exploring Different Mounts and Tripods for Astrophotography Setups
There is a wide range of astrophotography gear available for mounts and also for tripods. If you are looking for a telescope mount, the two are normally incorporated into one item. For example, I bought an equatorial mount for my telescope tube, and the one I chose was an Ioptron CEM26 mount. The tripod and mount were sold together.
However, if you are looking to swap your mount and want to save some money, it may be possible to buy the mount on its own and fit it to your existing tripod. You must make sure that if you do this, the tripod you have is compatible and strong enough for your new mount. Obviously, buying the whole mount and tripod together ensures you don’t have this problem.
Let’s turn our attention to these two items in more detail.
Mounts
The two most common mounts that are used in astrophotography are called Az-Alt and Equatorial (EQ) mounts. They work in different ways and you will need different routines for different astrophotography setups.
The AZ-Alt mount is good for beginners because it is more simple and quicker to setup. There is no need to align your telescope with the Polar North, as we have to with an Equatorial mount.
I started using an AZ-Alt mount and found that it worked well up to a certain point. With very long exposures, the accuracy of the mount becomes more of a concern. I was able to get 30-45 second exposures from my Celestron SLT 130, which was more than enough to get started. However, without guidance, I noticed I had to throw away many of my photos as there was movement that spoiled the picture.
It’s only when you want to get serious with astrophotography, especially with deep-sky objects, that you’ll need much longer exposures. I decided to change to an equatorial mount, and despite the learning curve at the beginning, once I figured out how to use the mount, I haven’t looked back. I’m glad I made the change!
When looking for a good mount, I advise you to choose from some of the more trusted brand names, such as Sky-Watcher, Celestron, Ioptron, or Orion. Find out more about the best telescope brands.
Tripods
The only things you need to think about when choosing a tripod for astrophotography are:
- it’s load capacity
- how sturdy it is
- Is it portable?
- Can you connect a camera or telescope to it easily?
Here is more information about choosing the best tripod for astrophotography.
Understanding the Importance of a Sturdy Equatorial Mount
The mount must not move. We are talking very small movements here. I walk near my telescope, and the vibrations in the ground are sometimes enough to shake the telescope. I know this from my guiding programme (I use PHD2). I can easily see the slightest movement of the telescope and the correction that my guidance makes to move the scope back to the correct position.
One of the most important reasons for a sturdy mount is to avoid wind shaking. I have often experienced a lovely, clear evening with very high winds. The guiding showed that conditions were really moving the telescope setup badly.
If you are planning on travelling with your gear, you need to take into account the load capacity of your tripod so that it can safely and easily support your equipment. The better its load capacity, the steadier your pictures will be. Usually, more load capacity means heavier materials or larger equipment, so a tripod strikes a balance between portability and stability.
Considering the Benefits of a Star Tracker for Astrophotography
A star tracker is a portable mount made with travel in mind. It should be easy to set up, accurate enough for good photographs, and ideally not too expensive. I am currently thinking of buying one so I have a second portable setup that I can take with me on trips. My usual astrophotography setup is used at home in my garden.
There are many star trackers available; some are mechanical and don’t need power, and some need to be powered just like a normal mount. These kinds of star trackers can even be used with small guiding cameras and a polar scope. These estar trackers are usually mini-equatorial mounts that can be used on a simple tripod.
Once more, household names like Sky-Watcher, Ioptron, and Omegon produce the best star trackers. New models are coming into the market all the time, and the price seems to be around the $400-$700 mark.
If you want, you can even try to build your own DIY star tracker, and you can find many sources of help and inspiration for this online, both on YouTube and in the major astronomy forums.
Evaluating the Pros and Cons of Using a Telescope with a DSLR Camera
I currently use a telescope with a dedicated astronomy camera. I decided there were more pros to using one of these and more disadvantages to using a DSLR. So what are the pros and cons?
Cons of using a DSLR with a telescope:
- Noise is a big problem with DSLRs, and they cannot be cooled.
- A DSLR must be modified to increase sensitivity to hydrogen alpha. This is a fiddly job that risks damage to your camera. I paid a friend who has a photography business, and they did a good job.
- I had to modify my telescope to reach focus with a DSLR. Some people cut their telescope tube to move the mirror, but I did find a simpler solution that is non-destructive.
Pros include the following:
- simple for a beginner to get started and it is more likely that you will already have a DSLR camera
- it is a good way to learn more about photography
- a DSLR is generally cheaper than a dedicated astronomy camera, which costs around $1000 on average.
- you can photograph space with a DSLR without a laptop or computer
Choosing the Right Accessories for Your Astrophotography Setup
Are there any budget-friendly astrophotography setups?
Ok, here are some of my budget-friendly suggestions:
- build your own simple DIY star tracker and save hundreds of dollars
- if you change your telescope setup, keep the old OTA (telescope tube) and just replace the mount
- use a star tracker rather than a full equatorial mount
- focus on widefield astrophotography and stick to simple astrophotography setups that only require DSLR and a wide lens and do not require very long exposures from an expensive mount
Now here are some budget-friendly astrophotography setups:


