Table of Contents
There is much to learn about photography as it applies to astrophotography. Some say, and I agree, that astrophotography is the most difficult form of photography because it is low light and requires long exposures. One of the most important questions I asked when getting started was what astrophotography settings do I need to set on my camera and equipment in order to get a good exposure level in my astrophotos?
Settings that are important for correct exposure in astrophotography include ISO (for DSLRs), gain (for dedicated Astro cameras), exposure time, and adjustments in F stop value. These astrophotography settings increase or decrease exposure but can also increase the negative effects of light pollution in your photo.
I’ve learned so much in my first few years as an astrophotographer about the settings that work best and on this page, I will try to demystify this for you. You’ll see that it is not so difficult once you understand what each setting does and how different targets and different equipment have a bearing on the astrophotography settings you should use. So, if you’re new to astrophotography, or have done it before and are looking for better results, keep reading!
I’ve written this short guide to set up your telescope and other equipment for astrophotography – it will be most helpful to you!
How do You Know When Exposure is Correct?
When I refer to exposure, I am talking about the final exposure level of your photograph. If exposure is not enough your object will be darker and it means you have not captured enough light. If exposure is too much in astrophotography, parts of your image will be blown out. This happens especially with cores of galaxies or stars which are much brighter than other details in astrophotos.
Ideally, what you want is a clear image showing all the details including shadows as well as highlighted areas. This is often not easy to achieve in low-light astrophotography where some targets have extremely bright and extremely dark areas. Added to this is the problem that there are often very faint areas that are interesting but more difficult to capture, for example in nebulae.
How do we know if a picture is exposed correctly?
In such cases where the target has very bright and very dark areas, we cannot completely appreciate how correct the exposure is until we check the final image after it has been processed. It is, by the way, possible to adjust exposure levels in post-processing in Photoshop or other software such as Pixinsight or Gimp but we should try to get the exposure correct when taking the shots. How can we do this?
One problem astrophotographers face is that after taking a photo, because it has been taken in such low light, we cannot see all the details until it has been stretched. Learn more about how to stretch an image in Photoshop. So, we need something to guide us. This guide is the histogram.
Here are my 5 top tips to follow so you can be better at astrophotography.
What is a Histogram? Why is it Important for Exposure?

An example of a histogram as often used in photography is seen above. When I take images of astrophotography targets I usually use Astrophotography Tool to plan and capture my images. After each photo is taken this histogram appears below the preview image. But what does such a histogram show and why is it beneficial for correct exposure?
A histogram shows the distribution of pixels in the spectrum of an image. On the bottom axis, the further left you go, the more black the pixels there are, and the more to the right you go the whiter the pixels. This histogram above is a combination of Red, Green, and Blue often called RGB, but when processing in programs such as photoshop we can look at the histogram of any image in different colours, so you may have four histograms (one for Red, Green, and Blue and combined RGB.
When trying to get the correct exposure of my image, I simply take the photo with the settings I want and then check where the histogram is on the x-axis. Usually, in astrophotography, the histogram is very narrow and to the left. It should be no more than one-quarter of the way across from the left or it will be overexposed after the image is stretched in post-processing. This is how I know if my astrophotography settings and exposure time are correct.
How Astrophotography Settings Change According to Your Target
Some targets are very bright, such as the Moon or planets like Jupiter or Saturn. They require very short exposure time or the details will be completely blown out. To photograph these targets we use quick shutter speeds that are fractions of a second. In your viewfinder, you can change this setting when aiming at the moon or planets and see how it changes the exposure and brightness of the object. To see all the details you need to make the shutter speed quicker and this will reduce the brightness in the live view.
What Do Different Camera Settings Do?
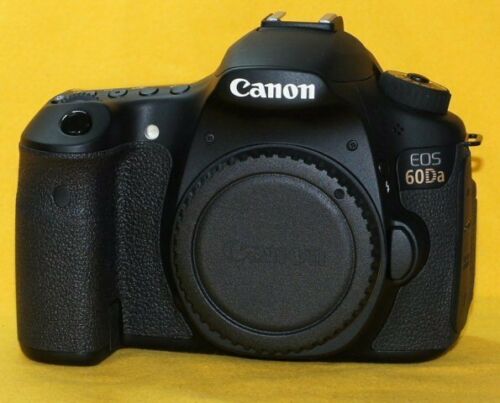
As we have said before you can get great photos you need to understand what these different settings do so in this next section we’ll look at each setting, what it does, and what astrophotography settings you might need. Also, the resolution of your camera is important..
Shutter Speed and Exposure Time
Normally when using a camera we shoot in the daytime and therefore we have the term shutter speed. If an object is moving quickly or is lit very well the shutter speed is very short. In darker conditions, such as in astrophotography, we need to use longer exposure times, so the term shutter speed becomes exposure time in seconds or minutes.
Shutter speed is adjusted to let in more light and the same is true for exposure time. As galaxies and nebulae in deep space are so faint we need to expose our camera for many seconds or even minutes to be able to image anything sufficiently. But exposure time is not the only consideration for correct final exposure of the image.
Let’s now check out the different astrophotography settings you will need to adjust on your camera for the correct exposure.
ISO Setting
In photography, the ISO setting adjusts the gain in the brightness of the image in a DSLR camera. It is the setting that amplifies the strength of the light that is captured.
Many cameras, such as the Canon 600D which I use, have an optimum ISO setting at which the noise and dynamic range of the image are best. We want to take pictures at this ISO setting. When I take photos with my Canon 600D I use an ISO setting of 800 as this is recommended for my camera. It is also a good idea to do a test yourself and I did this and confirmed that for my camera this is the optimum ISO setting.
As a quick aside, I want to point out that there is a common misconception about ISO that you should be aware of. Many think that increasing ISO means increasing noise, but this is not correct. So don’t make this mistake when taking your astrophotos.
Gain
If you use a dedicated astro camera such as a ZWO, QHY, or something else similar, you need to choose a gain setting rather than an ISO but this is essentially the same thing. For many astro cameras unity gain is used which often equates to a gain of approximately 100. At this gain, noise is low and dynamic range is high. Going above this may degrade the picture a little.
The F-Number
This setting may be fixed for your optical system. In other words, a telescope has a fixed F number. My telescope is F5 which is quite good. The lower this number the more quickly it can gather light. If we talk about camera lenses they can have a fixed or adjustable F number. My Samyang 300mm lens has an adjustable F number and if you can use a low number say 2.8 this will allow more light to pass and reduce the exposure time necessary to get the same brightness level compared to a lens with a higher F number.
Another very important factor that can influence how well your optics work is cleaning your telescope mirror.
You will also find that lower F-number lenses are more expensive because they are better at letting light through and will result in better and quicker pictures. Really good lenses that can be used for astrophotography should have an F-number of 1.0 to 3. This doesn’t mean cheaper lenses cannot be used, they will just need more exposure time. Here’s what to look for when choosing a good lens for astrophotography.
White Balance Setting
Normally for astrophotography, we need to set the white balance to either daylight or automatic however the white balance can be adjusted as needed in post-processing. This setting is only necessary for DSLR cameras.
White balance can easily be corrected when processing your image. So use one of the above settings on a DSLR and then forget about it until the time comes to calibrate the colours in your post-processing software.
Should You Use a Manual or Automatic Focus Setting?
For astrophotography, you should select Manual focus. You will have to adjust the focus until you get the sharpest image and you may have to refocus at certain times if the temperature changes or for a variety of other reasons which we won’t go into here.
Of all the astrophotography settings, the focus is probably the most important. Out-of-focus images are unusable and cannot be corrected later. Therefore, make sure to spend time checking good focus!
Factors to Bear in Mind When Changing Your Exposure Settings in Astrophotography
One very important thing to think about when choosing your astrophotography settings, especially the exposure time, is the amount of light pollution you have where you are shooting. More light pollution means that you should shorten your exposure time and possibly your ISO setting or gain because you don’t want to amplify this unwanted signal.
If you have too much light pollution where you are imaging it can wash out your target and make it more difficult to see the details in your image. Light pollution can be taken out in your processing software but as it increases it gets more difficult to remove it without impacting the nebula or other deep sky object you are trying to photograph. Don’t forget that when photographing planets or the moonlight pollution is no longer an issue because these objects are so bright.
You can check levels of light pollution by looking up with an app such as clear outside as it gives a number on the Bortle Scale. A perfect Bortle 1 sky is dark and contrast in your image is maximized. A city may be Bortle 8 or worse and will make imaging deep sky objects very challenging. Find out more about light pollution here.
Again, the best way to ensure that your exposure is correct for any astronomical target is to look at your histogram to see what kind of exposure level you get after you have selected your astrophotography settings and taken a test shot. Chances are that if your histogram is too far over to the right, then most of your exposed image is light pollution, so be sure to use a lower exposure time to bring that histogram to no more than one-quarter from the left.
One other point to bear in mind is the phase of the moon and how that affects the sky as you image. In fact, a moon above about 50% illumination brightens the background sky so that the contrast of your target is lessened. Unless you use special techniques such as Narrowband Imaging or special filters it is probably not worth imaging when the moon is full or more than 50%. It can be done, but if you’re not experienced yet it’s best only to image when the sky is dark and not lit by the moon.
Final Thoughts
Your astrophotography settings are extremely important but even if you have matched them as best you can to your imaging environment and conditions, it may still be necessary to shoot some targets at two different exposure levels.
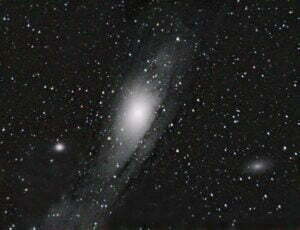
One example of a target that needs to be shot at different exposures is the Andromeda Galaxy. The centre core can easily become overexposed after 30 seconds or less of exposure time, whereas the galaxy body itself needs longer exposure time. This is why when I photographed this galaxy I used 30 seconds for the core and two minutes for the rest of the image. I then combined them in photoshop for a much better and evenly exposed image.
