
Table of Contents
Astronomy lovers often view telescopes as tools that take them on a tour of the universe’s wonders, allowing an up-close observation of celestial bodies and unveiling mysterious phenomena in outer space. Telescopes are also vital for astrophotography.
Among the many vital components is a telescope GoTo mount system. In this article, I will include an in-depth exploration of what GoTo mounts are—their operation, usefulness, and how best to set them up with a telescope for your astrophotography imaging session.
I will also give you my take on telescope Goto Mounts and what I have discovered by using them. I hope you find this post helpful, especially if you are considering buying a Goto system.
What is a Telescope GoTo Mount?

Above, we can see a picture of the first telescope I used for astrophotography. It is a Celestron 130slt with a telescope Goto mount. This telescope introduced me to the goto system. This kind of mount is a computerised mount with a hand controller that can locate and move to different astronomy targets that are programmed into its large database.
The telescope Goto mount here is an alt-AZ version, and I found this model to be very easy to use, even as a beginner.

- Reflector telescope
- 130mm aperture
- Go to System Computerized
- 4000 object database
- Perfect starter telescope
Although this kind of Goto system was easy to use, I did find it difficult to bend over, sometimes into difficult neck-twisting positions, kneeling on the ground, and trying to centre the star in the eyepiece. Several times, the hand controller just kept telling me the alignment hadn’t worked and I had to start again. With practice, this can work, but it is sometimes very tricky. In the end, with this telescope, I found I could get near the target by aligning two stars separated by some distance in the sky. How easily you can align your model of Goto telescope will vary depending on the model and method of alignment.
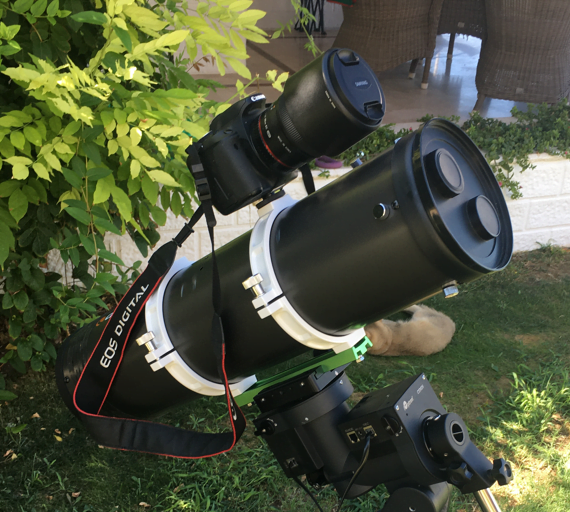
My Ioptron CEM 26 goto equatorial mount provided me with new challenges as I had to do Polar Align for the first time. I also found it more difficult to align the scope. It was definitely a more complex system than for my previous Alt Az Celestron Goto mount. With time, I got better at this, but in the end, I resorted to plate-solving, which is much easier and saves me so much time.
With telescope using the Goto system, everything is normally controlled from the handset and this is a very sensitive piece of equipment you need to take care of. I didn’t use my Celestron for several months and when I switched it back on, the handset no longer worked. Pity!
Goto Mount vs. Manual Mount
As we’ll see in the next sections, there are many more advantages to using a telescope Goto mount compared to a manual mount.
With a manual mount, you need to keep adjusting the tracking regularly and this is only practical for observation work, not for astrophotography, where you need good tracking to ensure your long exposures do not suffer from star trailing.
Below is a manual mount where you can see the manual tracking controls. This is very old-school but much cheaper. You can see it costs just $200.

- Less than $200 (price may rise)
- 900mm focal length
- EQ3 equatorial mount
The difference between using a manual mount and a Goto mount
A manual mount needs to achieve the same as a go-to mount, but you need to adjust it. The Goto mount, once set up, can do these things automatically.
Any telescope mount, for observation or astrophotography, needs to do two things accurately:
- To locate objects in the night sky according to their coordinates.
- To track the objects as they move across the sky.
Locating objects is important for both observing and photographing space objects.
To locate objects correctly, the telescope mount needs to be set up so it knows exactly where it is pointing, and it needs to be calibrated so that if you enter the coordinates of any deep-sky object, it will point to the correct place and find the target. The telescope mount needs to be set to a few reference points so that it is correctly calibrated and knows which coordinates it is pointing to and where it needs to point to move to any given target’s coordinates.
The main difference here is that when you are using a manual telescope, you will have to manually adjust the telescope to move it to your object and then check that you have located the object.
Once you have the object in view, you’ll need to adjust the knobs every so often to track the movement of the object. If you don’t manually do this, the object will drift out of your eyepiece.
One solution to the tracking adjustment is to fit a motor that will move the telescope at a fixed rate to track the object for you. You may have to make small, manual adjustments to this over time, depending on how accurate it is.
As we will see in more detail below, a Goto mount just needs to be correctly aligned, and then it will slew to objects and track them automatically. If everything is set up well, there is no need to manually adjust anything, and you are set to use your telescope for observing or for astrophotography.
Advantages of Goto Mounts for Stargazing
There are a number of benefits to the telescope Goto mount for both amateur astronomers and astrophotographers. With swift and accurate positioning, even elusive targets can be tracked efficiently, granting more valuable observation and imaging time. The GoTo Mounts’ computerised system ensures an exceptional level of accuracy, making them easier to use than other kinds of mount. This computerised system helps in the following ways:
- saves time by reducing the manual search for celestial objects.
- swift and accurate positioning
- elusive targets can be tracked efficiently
- more valuable observing or imaging time.
A Telescope GoTo Mount has a computerised system that automatically points the telescope to astronomical objects selected by the user. This feature is particularly useful for beginners who may not be familiar with the night sky, as well as for advanced astronomers who want to save time locating specific celestial bodies.
Another key feature of a GoTo Mount is its tracking ability. Once the telescope is pointed at an object, the mount can automatically track that object across the sky. This is especially beneficial for astrophotography, as it enables long-exposure photographs without the object drifting out of view.
Finally, GoTo Mounts are designed with portability in mind. They are often compact and lightweight, making them ideal for those who wish to travel with their equipment. Despite their small size, these mounts are sturdy and capable of supporting a wide range of telescopes and other equipment necessary for observation or astrophotography.
In my experience, I would advise anyone looking for a telescope setup to consider a telescope Goto system because it simplifies everything. With all the above benefits, it doesn’t make sense to me to cut corners and go for a model that does not have this computerised feature.
It is equally important for observation and for astrophotography that your mount makes it as easy and quick as possible to find the object you want to target. Astrophotography requires an accurate auto-tracking telescope mount, even more so than for observation, so this is even more of an important benefit if you want to photograph astronomical objects.
Bear in mind, though, that both my setups so far have used this system, and I have not tried a manual system without Goto, so not everyone will agree with what I have said, but I am sure that if you are new to astrophotography, it will be a big advantage to have a telescope Goto mount.
How to Use a Goto Mount
When I first got my telescope with its Goto mount, I expected it to instantly move to and locate the object I selected on the hand controller. I have a comical memory of the first time I went out and tried to go from one target to the next and could not see anything at all. What a surprise!
What I failed to understand is that the Goto mount must first be aligned with at least two stars; three is better. Once you do this, it knows where it is pointing and can then find your chosen target.
In the case of my AltAZ model, two motors move the scope horizontally and vertically to find your object. Therefore, the scope moves in two directions. This is easy to understand but is not as good as an Equatorial mount at tracking the movement of stars and deep-sky objects. I often get odd shapes and sudden movements when trying to take pictures for longer than about 30 seconds. This meant I had to reject many images that I took and had less to stack.
With an equatorial telescope mounted, tracking is easier once the object is found because the mount is aligned with the celestial polar axis around which all the stars rotate. All the telescope needs to do is move in one direction around the polar axis. This makes the tracking more accurate. With my newer goto telescope mount (an Ioptron CEM 26), I could easily take two-minute-long exposures without any guiding, and the star trails were not noticeable. I did sometimes have to reject perhaps 10–20% of these, though, as there were small movements that spoiled the image.
With the first telescope I had, I did ensure the mount was level and I believe this is even more important with an equatorial mount. There has been some discussion about just how important this is, and you can check out this video by Cuiv the Lazy Geek who questions how important levelling of a mount actually is.
When I began using a guide scope, I found that my rejection rate was almost zero and I could track for as long as I wanted. I tend to only use exposures of a maximum of ten minutes, but I could do much longer without any problems. I recommend an Equatorial mount.
Which telescopes can be used with go-to mounts?
Generally, any type of telescope can be used with a Goto mount. These include:
- Refractors
- Newtonian reflectors (this is what I use)
- Cassegrain-Schmidt
- Dobsonians
- and more.
Best Goto Telescope Mounts
If you’ve got this far, you’re probably thinking, I need a Goto telescope mount, but which one is the best? Before deciding which are the best Goto mounts we should first think about which telescope company makes the best ones. After this we will consider what you need from a telescope Goto mount because there is no sense in paying too much for a mount you can’t use. Likewise you don’t want to get something cheap that will not be up to the job and that you will regret buying later.
There are some really good brands of telescope mounts such as Skywatcher and Ioptron (which I use). You can read more about telescope brands here.
Considerations when Choosing a Go-To Mount
There are a number of important factors to consider before choosing a Goto telescope mount. These include:
- How much weight can your mount carry? You need to make sure it can support all the extra equipment you have, such as a camera, guidescope, etc.
- How good is the tracking? You need this, especially for astrophotography.
- Does the mount have a large enough database with the kind of targets you want programmed into it?
- How easy will it be to use the GoTo system and hand controller? The easier, the better!
Top 3 Goto Mounts from Sky-Watcher that I recommend:


- 44 pounds capacity load
- Accurate Goto
- Includes polar scope
- portable

- Complete kit plus tripod
- Wifi control
- Astrophotography on the go!
- Polar scope included
Tips for Using a GoTo Mount Effectively
To make the most of your GoTo mount, consider the following tips:
- Calibration: Regularly calibrate your mount to maintain its accuracy and performance.
- Astronomy Apps: Utilise astronomy apps or software that can sync with your GoTo mount to expand your observational or imaging opportunities.
- Object Catalogues: Explore various object catalogues available for GoTo mounts, such as Messier, NGC, or IC catalogues, to discover interesting celestial targets.
- Observing and Imaging Plans: Plan your observing sessions in advance by creating a list of objects you want to observe. This allows for efficient and focused stargazing. There is a lot of software you can also use for this, such as the astrophotography tool, which I use.
- Tripod legs: One final but most important tip I’ve found is this: keep your mount tripod legs as short as possible and make sure they are tightened to increase the stability of your setup. By doing this, I have been surprised that the wind is much less of a problem, even though I live in a very windy location near the sea.
Maintenance and Care of GoTo Mounts
There is not much to think about in terms of caring for your mount. The most important things can happen when you are using it, so let’s start with how to store it.
Make sure if you store it for short periods, you set the weights for an equatorial mount into zero position with weights pointing down. This removes any load from the mount. If you store it for a long time without using it, take the weights off or disassemble the mount completely.
Make sure to regularly clean the mount from grease or dirt. Be careful when doing this!
Always ensure while using the mount that you monitor the mount at critical times, such as the meridian flip. I have experienced crashes where the mount weight or balance bar hits the legs, and this can damage the motor. The best reaction if this happens is to immediately switch off the motor and release the clutch, moving the mount to remove any pressure on the motor.
When sewing, you should watch your telescope carefully and ensure there are no snags or strains. Don’t leave these things to chance. A Goto telescope mount is probably your most important and valuable piece of equipment, and damage is both inconvenient and costly!
Conclusion
I hope this article has helped you understand what a telescope Goto mount is and how it can help you. If you are confused or need help choosing a mount, please send me your question. I’ll be glad to help you out!


