
If you’re interested in astronomy or taking pictures of the night sky, you surely know how important a decent mount is. When it comes to taking beautiful pictures of the night sky, a steady and accurate mount can make all the difference. Therefore, many astronomers say that the mount should be where you spend most of your money.
There are many choices of mount, and many manufacturers, but you should always go for the most reliable and do your research well before buying one. Most good mounts will cost you about $1000 or more, so you want to know what you’re getting before you spend your money.
A type of mount that many astrophotographers like to use is the equatorial mount. In this blog post, we’ll talk about what an equatorial mount is and how to make use of one effectively.
What is an Equatorial Mount?
An equatorial mount is a type of telescope mount that follows the stars as they move across the sky. It has two axes: right ascension (RA) and declination (DEC). The RA axis aligns with the Earth’s axis of rotation, while the DEC axis moves at 90 degrees to the RA axis. By moving along these axes, you can move your telescope to point at and follow the stars as they travel across the sky.
Equatorial mounts can be either German equatorial mounts (GEM) or fork mounts. Astrophotographers like GEMs because they are more stable and very practical. They have a long shaft for the counterweight and a mounting head with a saddle to hold the telescope. The mount head can rotate around the RA axis, and the counterweight shaft allows the telescope’s weight to be balanced.
Here are three equatorial mounts I recommend:


- 44 pounds capacity load
- Accurate Goto
- Includes polar scope
- portable

- Complete kit plus tripod
- Wifi control
- Astrophotography on the go!
- Polar scope included
How to Use an Equatorial Mount
Setting up an equatorial mount might be difficult, especially if you have never done it before. But with time and experience, you can learn how to use one correctly.
In my experience, I first used an alt-az mount and when I first tried to use my new equatorial mount there were quite a few things to learn. It took me maybe a week or so to fully learn how to use my equatorial mount. No big deal really!
Here’s what you need to do to set up and use your EQ mount:
First, Find a Level Spot
To use an equatorial mount, you must first select a level location. To track celestial objects accurately, you need a platform that is steady and level. When the telescope is on an uneven surface, it can wobble or shake, which makes the image blurry.
Although some say that the mount doesn’t really need to be very level, most astrophotographers will make sure their mount is level by looking at a bubble level that is usually installed in the mount.
Set Up the Mount
Once you’ve selected a flat area, it’s time to set up the mount. First, fit the tripod to the mount head. Then, set the legs of the tripod to the height you want. Make sure the tripod doesn’t move around.
Next, connect the shaft of the counterweight to the head of the mount. Change the height of the shaft such that the weight of the telescope and the counterweight are equal.
My tip for tripod legs: don’t extend the legs unless you really have to because this will make the tripod less stable. Especially if there is wind, opening the legs too much can cause movement while you are taking photos. You can use the legs to slightly level the mount if the ground is not perfectly level or if you are on a slope.
The Zero Setting of Your Mount
This is something that confused me at first but I can make this clear for you. Think of it like this, your telescope can be pointing somewhere in the sky but your mount needs to understand where it is pointing and where other objects are in the sky.
If you have a manually adjusted mount then there is no way that your mount can know where it is pointing or where objects are in the sky. If you have a GOTO mount it will have to be placed in the zero position and then aligned to know where it is currently pointing and where other objects are in the sky.
In order for the mount to be able to know where it is pointing it needs a reference point which it knows is North and pointing to the celestial pole, the point around which all the stars seem to rotate. The reference point is called the Zero setting and is the starting position for your mount.
I found it useful to mark in bright white paint the two points where my mount’s zero setting is. Make these once you have set your mount up in its zero position. The first place I put marks is on the body of the mount on either side of the place where the mount turns to move the telescope to the east or west (Right Ascension) if your telescope is pointing North. See my image below.
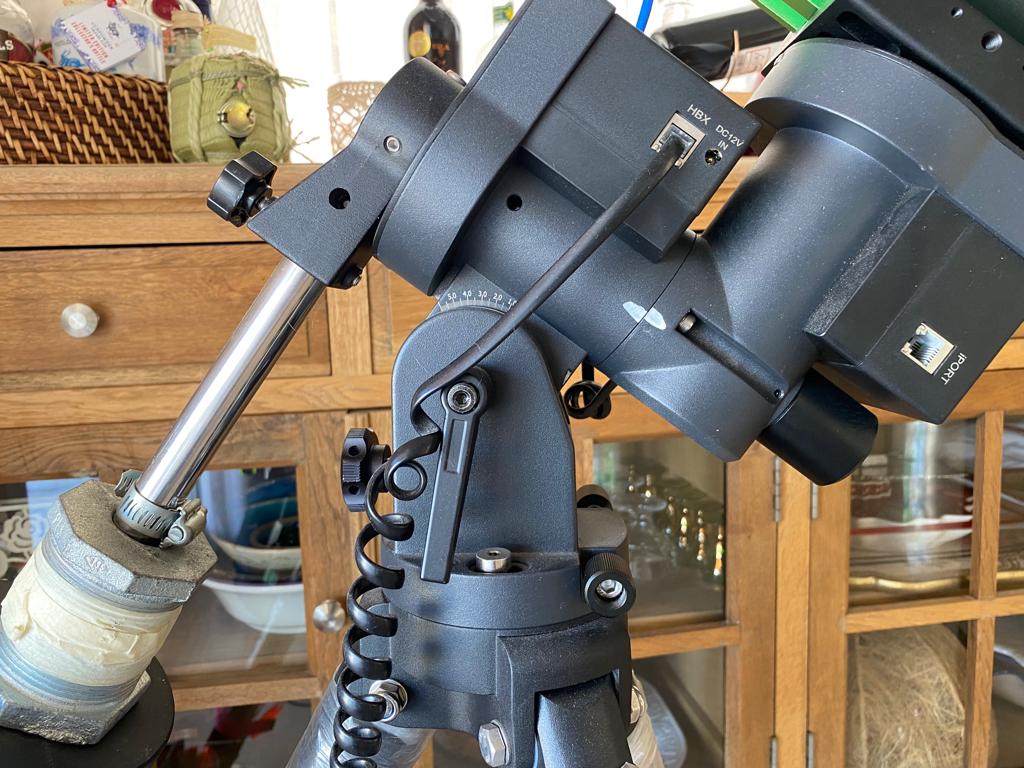
The second mark I painted was in front of the telescope mounting plate which rotates in a circle at 90 degrees to the movement of the mount (Declination).
The reason why I made these marks is to make it easier to check where the zero position for the mount should be. The counterweight should drop down with gravity until the mount and telescope are in a level position. The mounting plate should be marked at a certain point so you can clearly see when the telescope is pointing straight ahead.
This sounds more complicated than it is but with time and practice, you will be able to understand this easily. Always make sure your mount is set correctly to the zero position before you do anything else.
Align the Mount
Aligning the mount is the next step. Here is where things can get hard, but it becomes easier as you do it more. There are many techniques to align an equatorial mount, but the most important is polar alignment.
What is Polar Alignment?
Polar alignment begins by pointing the RA axis at the North Star. (Polaris). Actually, we need to find the exact point around which all the stars rotate and point the telescope at that point and Polaris is very close.
The point we are aiming for is called the North Celestial Pole. As the Earth spins the stars move across the sky. The point directly above the axis around which the Earth spins is the point around which all stars will rotate and there is also another point to the south which is used in the Southern Hemisphere.
For us in the Northern hemisphere, apps and software can tell us exactly when our telescope mount is aligned with the Earth’s axis of rotation and pointing to the Celestial Pole. I use SharpCap Pro, but there are many alternatives.
So, using an app or software of your choice, you need to align the mount with the North. Then, adjust the altitude axis of the mount (the part that lets the telescope point to different heights over the horizon) so that it matches the latitude of where you want to see. The degrees of latitude are marked on your mount so you can roughly set this to the correct point.
By making small adjustments to the knobs on your mount to move the mount to the left or right you can use your polar scope to move your mount to the exact position so it is aligned with the Celestial Pole.
Once you are Polar aligned correctly your mount will be able to track the movement of the stars and allow you to do longer exposures without any star trails.
I wrote this easy step-by-step guide on how to polar align your telescope mount. If you need more information this will help you for sure.
Balancing the Telescope
To make sure the telescope tracks smoothly and accurately, it is vital to make sure it is balanced. You have to balance the weight of the telescope and any accessories on both sides of the mount head. This will keep the telescope from becoming hard to maneuver or from falling over.
You will also have to use heavier or less heavy counterweights according to your equipment and move the weight along the shaft to adjust balance. Here is a good video by Dylan O’Donnell about balancing your telescope.
In addition to this if your mount is unbalanced it will put stress on your mount’s mechanics and cause errors in the tracking.
Star Alignment
Polar alignment will enable the telescope mount to follow the stars as they move and help you to get long exposure photographs without star trails. But, you also need to do star alignment to tell the mount’s computer system where exactly it is pointing and where other objects are.
So how do you do this?
In your manual, it probably tells you to star align on three stars in different parts of the sky. Depending on your mount, the best way may be easier than this. You’ll only learn what works best with practice.
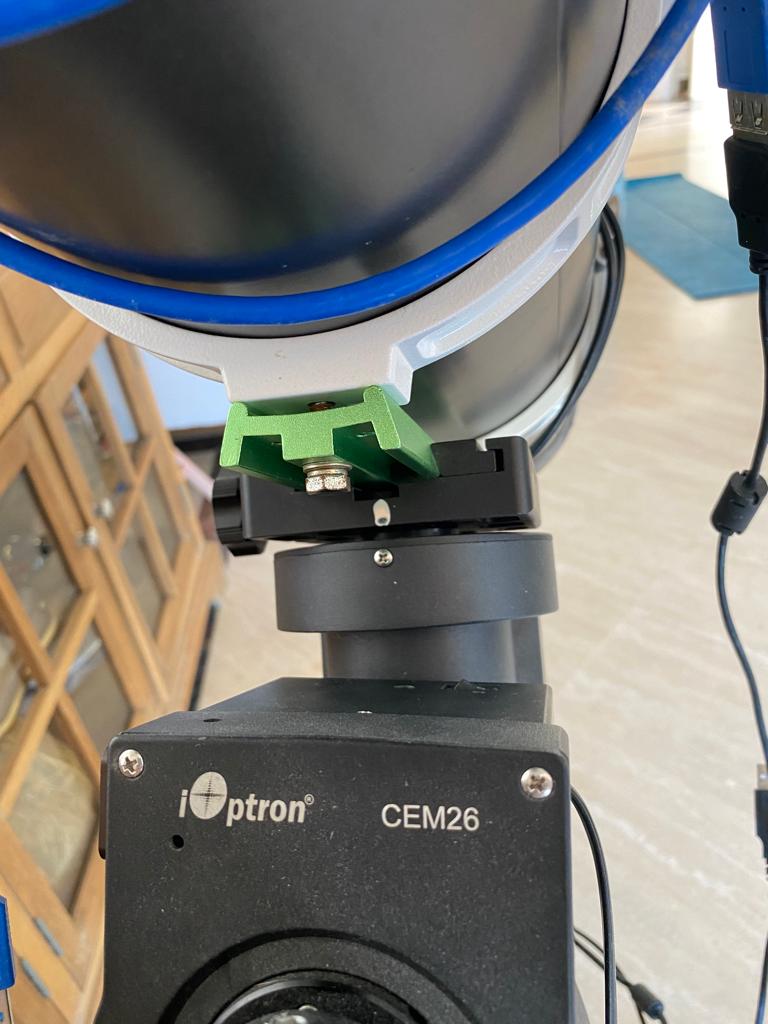
With my Celestron 130slt az-alt mount, I only needed to align on two stars a distance apart. But for my equatorial mount, an Ioptron CEM26, I have to align on three stars which the mount chooses for me or I can choose myself using the hand controller. This is what I did:
- From the zero position, I move the telescope to the first alignment star using the finderscope
- I think adjust the telescope until the star is in the centre of my eyepiece
- I press OK and move to the second alignment star and repeat
- I do the same with the third alignment star
- I wait for the hand control to confirm that everything is good and alignment is completed
Sometimes this procedure can take a few tries and also I found that crouching down and finding the star in the finderscope was a neck-breaking experience! You have to get this right though or the mount will not be able to find objects correctly. This is the whole point of a GOTO telescope, so you want it to work correctly!
Once the telescope is aligned you can move on to the next step. Also note that plate-solving makes this whole process quicker and easier and I no longer have to star align at all.
How to Point a Telescope
Now that the mount is set up and in the right place, you can point the telescope at objects in the sky. A finderscope or a red-dot sight can help with this. With these tools, you can point the telescope at whatever it is you wish to look at or take a picture of.
Pointing your telescope at objects using viewfinders is not always easy or quick. If you are not perfectly set up, your telescope may miss its target slightly and it will take time to find it. This is often a process of trial and error.
Another better way to point your telescope and find objects is to use plate-solving which means you’ll need to use a laptop and software such as APT (Astrophotography Tool) or Sequence Generator Pro. Again there are many alternatives. To find out more go to this post about plate-solving and this page about Astrophotography Tool.
Tracking the Object
Once you’ve discovered your target object, your mount should follow it. That is if you have an equatorial mount with tracking. If not, you’ll have to track objects manually by adjusting the DEC and RA. Mounts with manual control are only good for observation and not for astrophotography because you’ll need your tracking to follow objects for hours while you take long exposures of the object.
As you progress in astrophotography you will want to take longer exposures to bring out the fine details of deep sky objects and each exposure will be minutes long. You’ll need many images, so your imaging session will need to be automated. Manual adjustments to your telescope mount are not possible in this case.
Conclusion
The information I have given you here is based on my experience with my own equipment and you’ll need to modify this for your situation. Using an equatorial mount seems difficult, but once you get used to it, it will be no problem and the rewards are fantastic! Here’s to those long exposures and I hope that soon you’ll be taking the best photos of deep-sky objects possible! Good luck to you!


