
Table of Contents
If you’re not familiar with the meaning of the term astrophotography calibration frames used in astrophotography, then you should be, because they can dramatically improve the quality of your astrophotos. In this post, I will explain what they are and why they are so helpful.
If, on the other hand, you do understand what calibration frames are and are using them in your astrophotography workflow, you may wish to improve the quality of your astrophotography calibration frames. Perhaps you’re here to learn more about them in an effort to improve your astrophotography results.
Let’s begin with the basics first.
What are Calibration Frames?
Calibration frames are used in astrophotography to improve the quality of the final image.
Astrophotography Calibration frames are basically shots you take with your camera using an astrophotography setup in different ways and under certain conditions to remove imperfections in your images. A number of factors, including noise in your camera and flaws in your optics, are to blame for these imperfections.
Noise is a big problem, as I have personally experienced when trying to take photographs of the night sky. It became such a problem for me last year that I bought a new dedicated astronomy camera, the ZWO ASI533MCPRO, which produces much less noise than my DSLR did. This has made a huge difference in the amount of noise in my images and has enabled me to capture more detail and sharpness in my images.
The problem was worse in the summer months because DSLR cameras heat up to several degrees above the ambient temperature. In the summer, where I am located, temperatures are consistently above 30 degrees C at night, and I witnessed my Canon 600D DSLR camera reaching as high as 37 degrees C!
The ZWO camera I bought uses cooling, and I now take photographs at a set temperature of 0 °C, lowering the noise to a constant value. This means it is much easier to process the images and get great results.
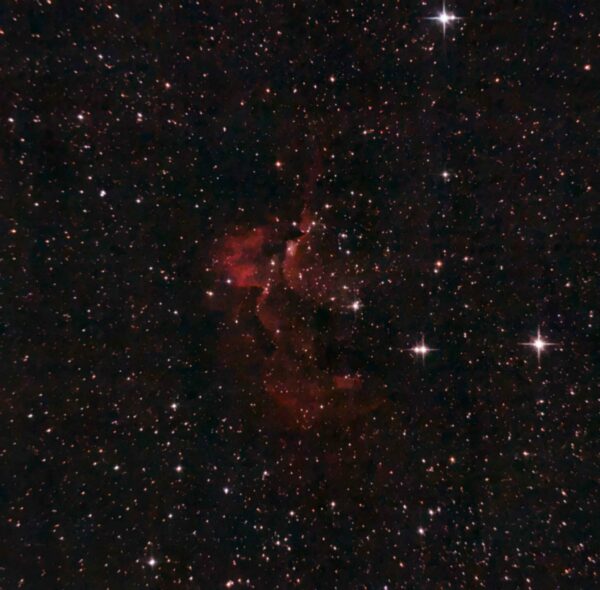
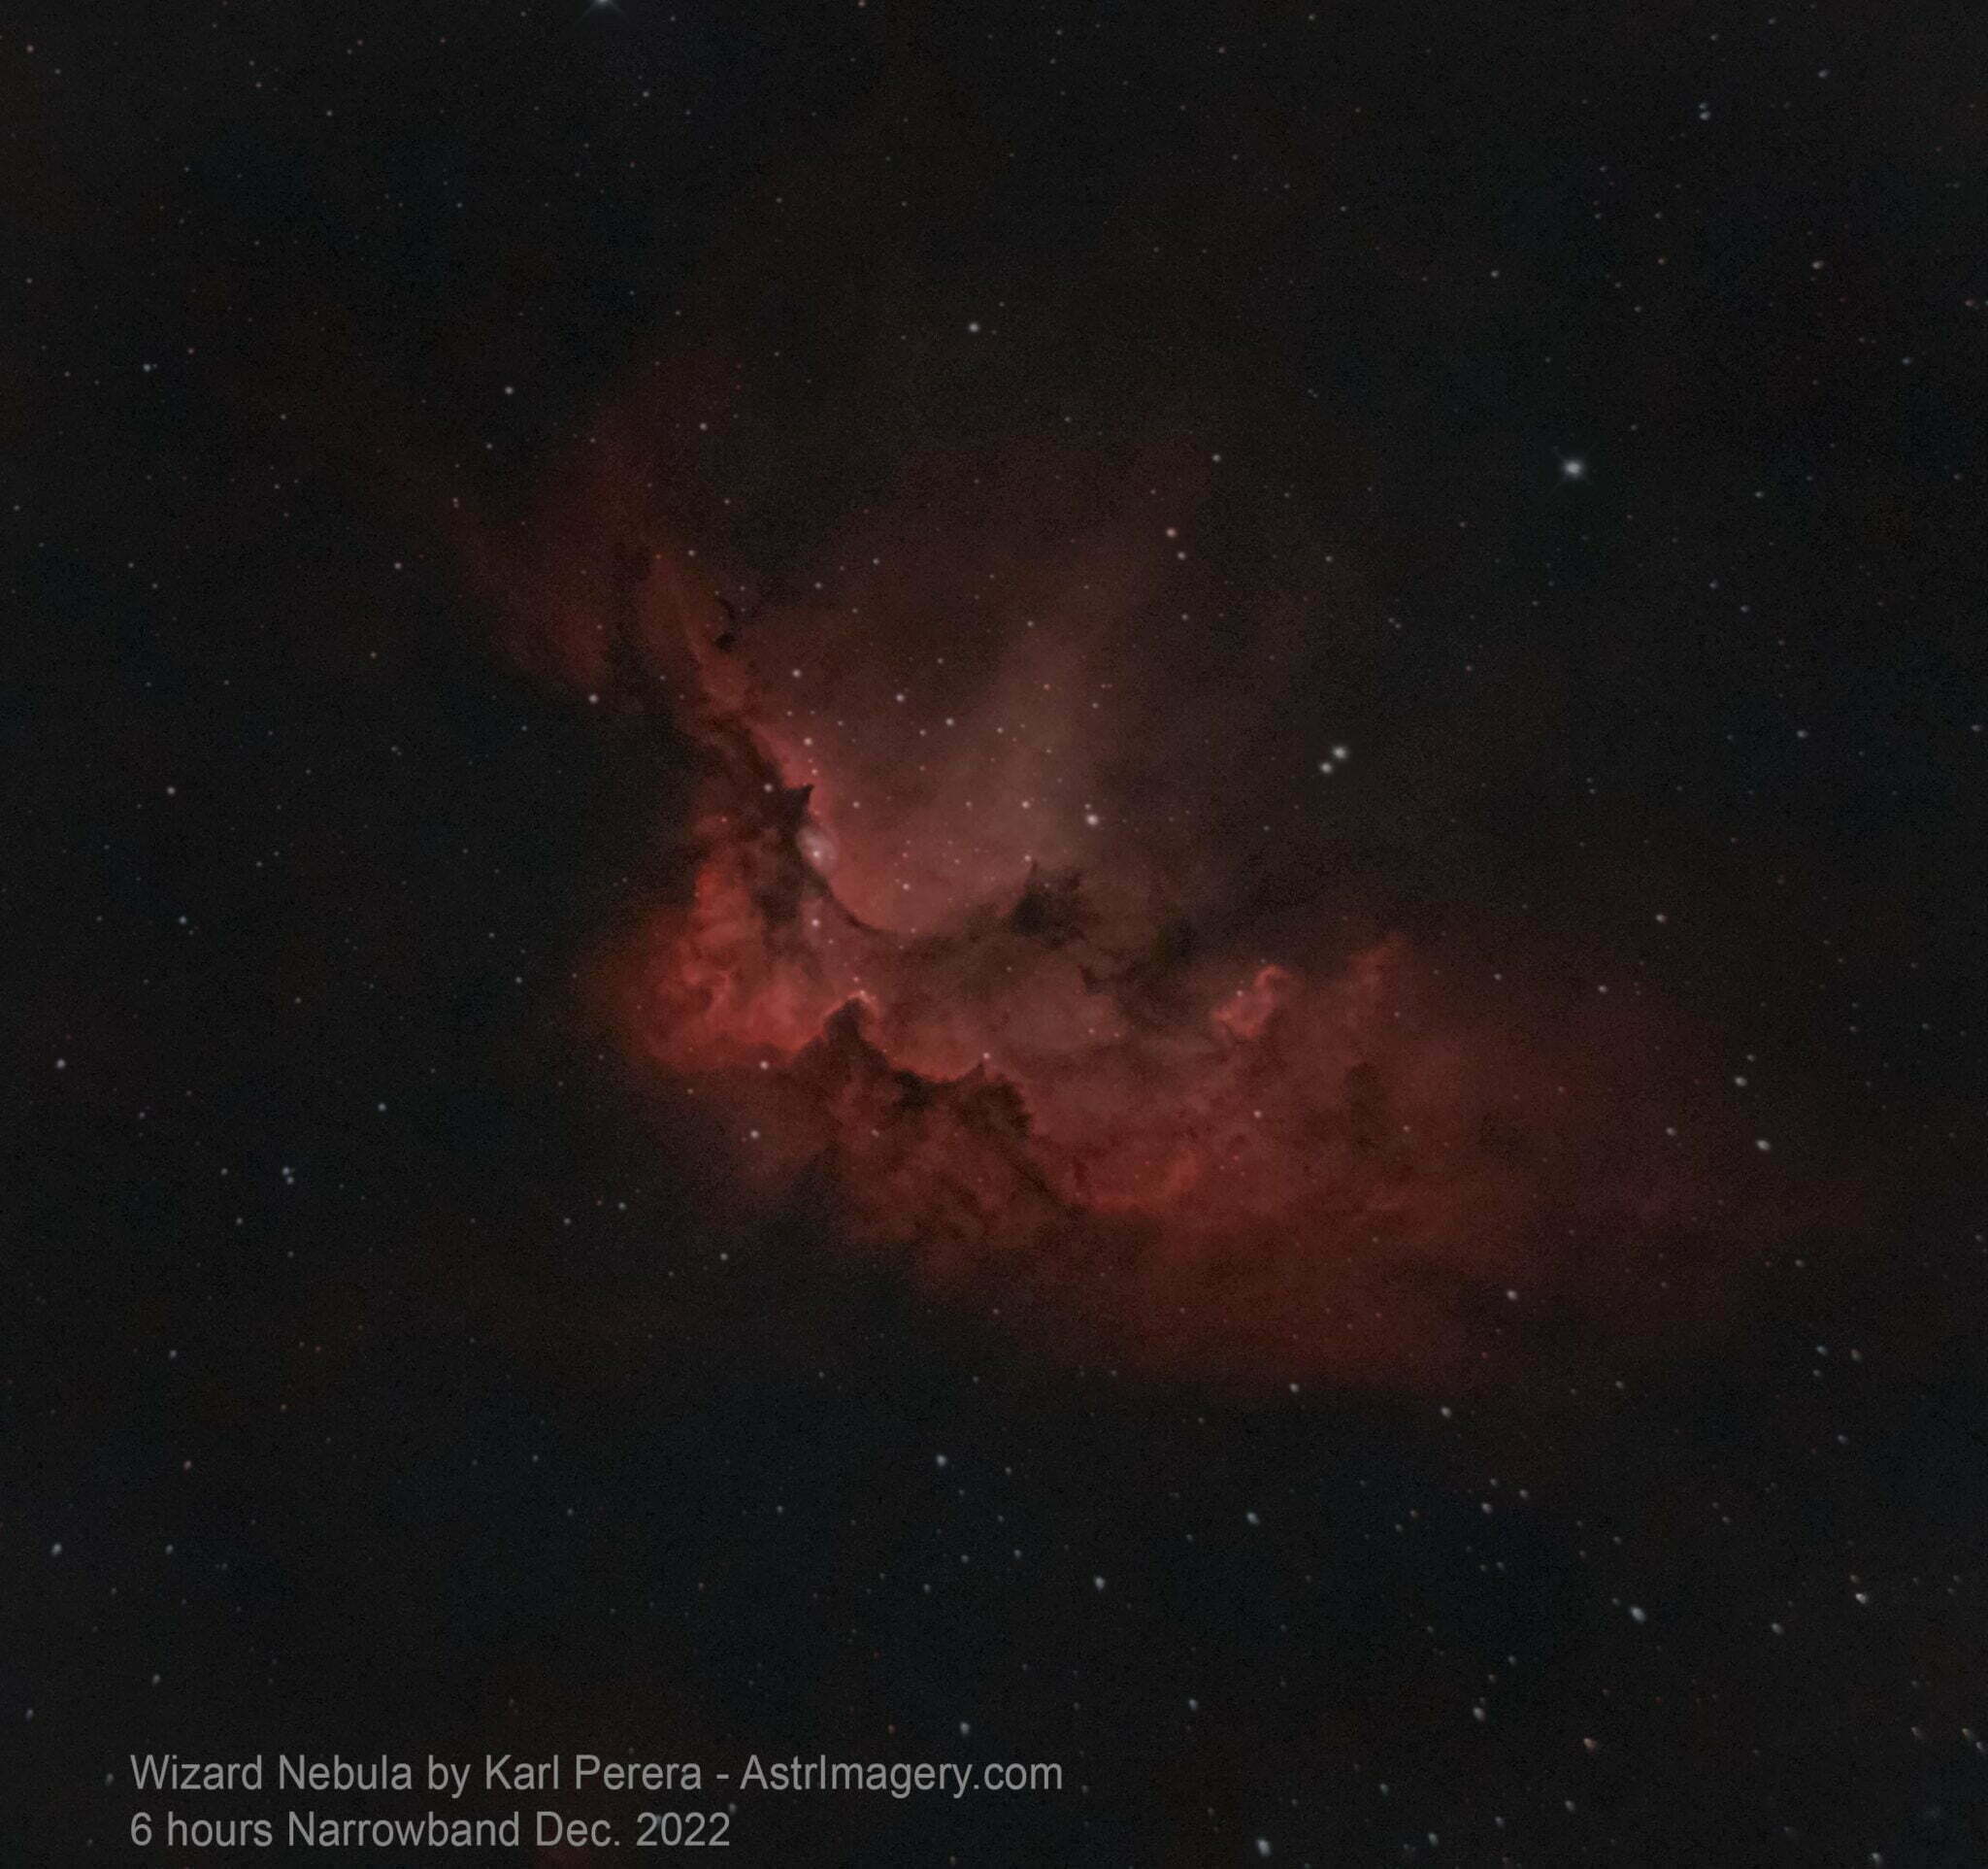
See the images below comparing my versions of the Wizard Nebula taken with a DSLR Canon 600D and with a ZWO ASI533 MCPRO. I think I took these two photographs barely six months apart. The huge improvement is from the cooled camera.
Types of Calibration Frames
Here is a brief outline of how these three kinds of calibration frames differ:
- Bias frames are taken quickly with the camera in the dark and the lens cap on. These frames give an average readout to remove the electronic noise inherent in the camera sensor.
- Dark frames are taken under the same conditions as your normal light frames (the photographs you take of your astronomical object). This means you must take dark frames using exactly the same setup you used for your images; nothing should be changed, including the optics, temperature, exposure times, ISO, or light conditions.
- Flat frames are taken using exactly the same optical setup as when taking your images. You should take these at dawn with the famous white tee-shirt method or using a lightbox.
Here’s a great solution for taking high quality flat frames:

- 6 brightness levels
- LED
- Wireless
- Works for 4-6 hours after charge
Understanding the Importance of Calibration Frames
All experienced astrophotographers know how important calibration frames are. They can drastically improve the quality of your astrophotography by removing noise and cancelling out things like dust on your optics.
When I tried using a DSLR, dark frames were especially necessary to remove a certain amount of the noise that was covering the detail in my images. I could not leave them out.
I experienced a few problems with astrophotography calibration frames. For example, dark frames took a lot of time to collect, and this was a time that I could have been taking more photographs of my target. More photographs mean I could stack more lights, and this creates a much better picture.
Simply put, with my DSLR camera, I had no choice; I had to use dark frames, and this meant sacrificing imaging time. I tested images with and without dark frames, and there was no doubt that I had to use them.
Once I started using my new camera, the ZWO ASI533MCPRO, I saw such a reduction in the level of noise that I no longer felt it necessary to spend this time collecting darks. In fact, I often skip these altogether, with, in my opinion, no major drop in the quality of the image.
The fact that I now use a cooled camera means that it is possible to easily build a library of dark frames at a constant temperature, whereas before the temperature would vary, and so this produces better-quality darks.
I also considered that I could build this library of dark frames without losing valuable imaging time. By taking darks using the exact same equipment in a dark room and cooling the camera to a standard temperature (I use 0 °C), I should be able to do this during the day. I know that the lighting conditions may not be exactly matched, but I can lower the shutters to mimic my nighttime conditions.

- TEC cooled camera
- 11.7 MP CMOS
- With WIFI
- Minimizes noise
- Great value approx. $730 (price may change)
I think this method is reasonable, but honestly, I prefer to rely on my improved processing skills now to remove noise. My images are so much better now!
Understanding Dark Frames and Their Role
Dark frames contain no light (give or take). They contain noise, and stacking programs work to calculate an average dark frame from the set you use. It is recommended to use at least 20 dark frames to get a good average.
Obviously, the longer the exposure time, the more noise the dark frame will contain. This is why the dark frame exposure time must match that of the light frame (your photograph).
Temperature, as I have said above, is important because your camera’s electronics will produce more noise as the temperature rises. This is why our dark frames also need to be taken at the same temperature as your light frames. Without a cooled camera, this is very difficult to do.
When you stack your images, dark frames containing the noise are subtracted from your image, and the noise is reduced significantly.
Flat Frames: The Key to Uniformity
What you aim to do with flat frames is to produce an image that is exposed to a certain level that will show the unevenness of the illumination in your optical field of view. The flat frame should be able to correct the image so it is uniformly illuminated. It can also help correct things like dust motes and dirt on a lens or mirror.
Personally, I have found flat frames difficult to do well using the basic methods suggested, such as the white tee shirt method. I suspect that using a light box is best. This being said, I prefer to find ways in the post-processing of my images to balance this out and remove these uneven areas from my images.
Improving Your Calibration Frames: Tips and Techniques
Astrophotography Calibration frames should be taken at the same temperature as the light frames for accurate calibration.
The solution to this problem is a cooled camera, as I have explained.
The Impact of Calibration Frames on Astrophotography Results
The difference that calibration frames make is noticeable if your camera is noisy and if your optical setup has problems. Even if your setup is very good and clean, it can make a difference in the quality of the final result.
Using good calibration files makes processing the final stacked image much easier and saves time as there is less noise, vignetting, or other problems to manage.
Astrophotography Calibration frames can create a cleaner, more detailed, and sharper astronomy picture that may appear more pleasing to the eye.
FAQ Section
Is it necessary to capture calibration frames for every astrophotography session?
No, it isn’t. If you image in the same place using the same equipment and exposure times, you can use dark frames from a previous imaging session. Don’t use old ones, though, because your camera sensor changes as time goes by and other factors can make them less accurate. Update them at least every 6 months or so.
Can I use astrophotography calibration frames from a previous session?
As answered above, yes, you can.
What software can I use to process my calibration frames?
I use Siril, but you can use Deep Sky Stacker, Sequator, and others.
Can I still achieve good results without using calibration frames?
This depends on many factors. If you use a cooled camera with low noise to start with, this is possible.
Are there any alternative methods to calibration frames in astrophotography?
The only method I know of is to improve your processing skills so you can better reduce the noise in your images. There is a plugin I use in Photoshop called Astro Flat, which helps even out images and replaces the need for a flat frame. I am not advising you to do this, but it does make things easier for me, and I am happy with the results.
What are some resources for further learning about astrophotography calibration frames?
Online:
What are astrophotography calibration frames, and why should I use them? — MAC OBSERVATORY
Books that will help you with atrophotgraphy and calibration frames:
| Image | Product | Features | Price |
|---|---|---|---|
 |
| Buy on Amazon | |
 | The Astrophotography Manual: A Practical and Scientific Approach to Deep Sky Imaging |
| Buy on Amazon |


