
Table of Contents
“There’s something special about capturing the glow of the Milky Way as it cuts across the entire sky.”
Timothy Printy – The Astroscopers’ Astronomy Group in Chiefland, Florida.
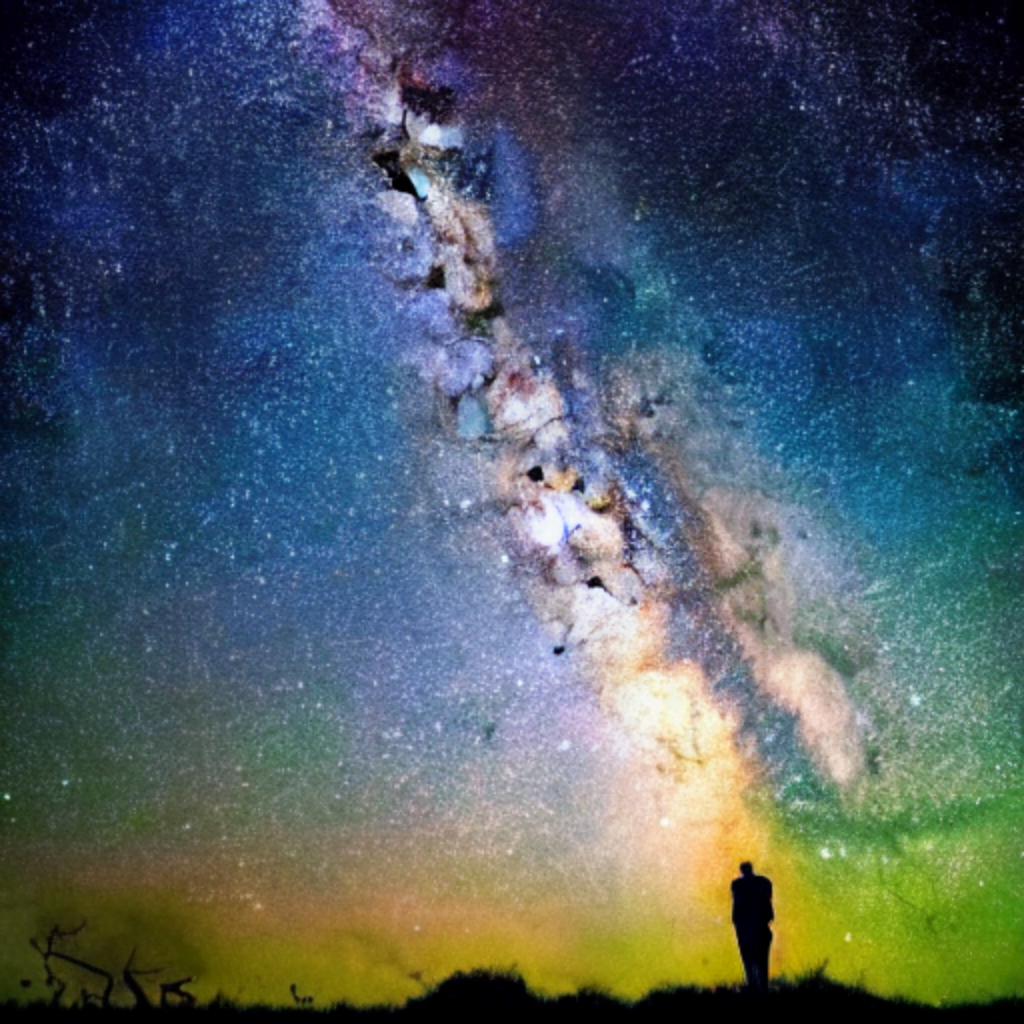
Have you ever seen those amazing pictures taken at night with the landscape and an amazing horizon filled with stars and an incredible Milky Way arch across the sky? Have you ever wondered how to photograph the Milky Way? Are you even capable of taking such pictures and if so how do you get started?
Last summer these were some of the questions I faced as I began my astrophotography journey. The first targets I had on my list were the most obvious and easy ones. I first started photographing the moon and even used my iPhone to do so. I quickly found that that was a nice way to start but was quite limiting. I then noticed pictures of the Milky Way taken by a friend of a friend locally. And as I had never seen the Milky Way with my own eyes I wondered how those pictures were taken and if in fact, they were fake.
In fact, as I soon discovered when I went out for an evening with a friend to take my first ever Milky Way pictures, it is very possible, even with budget equipment, to take spectacular photos of the Milky Way.
So let me explain how it’s possible and if you’re just starting I’ll show you through the experience I’ve had over the last year of taking shots of the Milky Way and experimenting with different equipment. And in different locations. It is not difficult to learn how to photograph the Milky Way, but composing the shots is something that you do need to think about, and taking the photographs at the right time of the year in the right season changes so much.
Taking photographs of the Milky Way involves finding a suitably dark site where you have a good panorama and view of as much of the sky as you can get. You need to use an application where you can see where exactly the Milky Way is at the time you want to shoot it, or if you go to a dark enough location, you will be able to see where it is.
You need to use a tripod that is stable enough to hold your equipment still for a period of time. When I first did this I was worried about the wind and I did, in fact, have to hold my tripod down on the ground just to make it that little bit more sturdy.
Even if you don’t have a special astrophotography camera lens you need to ensure that you’re taking photographs of the Milky Way at the right focal length. The camera lens I had was basically a 17 mm to 85 mm lens belonging to my Canon 600 D and that was enough to get started. I used it at 17mm, others use 14mm or 24mm as these are the kind of focal lengths suitable for widefield photography and will enable you to frame the whole of the Milky Way area in the sky.
Here is my advice on how to choose a good lens for astrophotography – click to find out what matters.
Another important thing when taking shots of the Milky way is to know how long to expose for and what kind of lens to use. I chose to expose for approximately 20 to 25 seconds but it does depend on how long you can expose without finding any star trails in your pictures.
Basically, as stars move across the sky and also rotate around the celestial poles there is a certain amount of movement of the stars and it doesn’t take long before this movement will affect your photographs turning your stars into ugly lines. Although many people say that you are limited to a matter of seconds, I have found that while taking widefield shots of the Milky Way I could take pictures of 20 to 25 seconds without significant problems with star trails.
The other important thing about your camera lens is the F-number. The best Astra photography lenses for taking photographs of the Milky Way should have an F number of say 1.8 to 2.8. However, as I have found, you can take good photographs of the Milky Way with even a camera at F 4 or 5. They won’t be as good but they’ll still be very very spectacular.
How long do you need to expose to photograph the Milky Way?
Photography is often based on trial and error and experience, and learning how to photograph the Milky Way is no exception. As I said above I used about 25 seconds of exposure which was the maximum that I could do without experiencing problems with star trailing. You might be able to go less or a little bit more than this depending on your equipment.
Another thing to note is that if you want to use longer exposures you will need some kind of a star tracker or equatorial mount, for example, which will track the stars. In that case, you may be able to do 60 seconds, 90 seconds, or even longer exposures, which will mean that you will have much more detail in each photo.
However, if you are limited to quite short exposures you can stack several photos. In the beginning, when I learnt how to photograph the Milky Way I didn’t know very much about stacking but still, I found it quite simple to download a free piece of software that would stack about 5 to 10 pictures and put them together and I ended up with quite a nice photograph.
How to photograph the Milky Way with your Phone
The answer to this question is quite simply yes. However, it depends on which model of phone you have, for example, I have the iPhone 6s and I can’t really take many photographs at night with any reasonable quality and I certainly couldn’t see how to photograph the Milky Way as I’ve tried and failed.
There are apps that you can get for your phone to hold the shutter open longer and expose the picture for longer. You must keep your phone very still while taking your shot so use a tripod.
Newer models of phones nowadays have even better cameras and even some of them have inbuilt software to allow you to take reasonable night sky pictures, so you may actually be able to take a photo of the Milky Way with your phone. However, I don’t really recommend it. There are much better options than a phone.
Probably the best of these is to use a DSLR camera such as a Cannon or a Nikon. I use a Canon 600 D modified for astrophotography. I get really really good detail in pictures. Check which are the best cheap cameras you can use for astrophotography.
Can GoPro Photograph the Milky Way?
A GoPro camera is not really designed to take a photo of the Milky Way but it can be used to take pictures of the Night Sky. Newer models such as the HERO 9 and 10 have better sensitivity to low light and a tripod is a must.
To use your GoPro for astrophotography set the ISO as high as it will go so it captures the maximum possible amount of light. The same principles apply as for any other camera regarding star trails and exposure length but try t find a dark location to get a good photo.
No GoPro can take a Milky Way photo that will compare to that taken with a dedicated camera or DSLR.
How easy is it to see the Milky Way with the naked eye?
8 out of ten people living in the Northern Hemisphere cannot see the Milky Way with the naked eye because of light pollution. Redfern (2018).
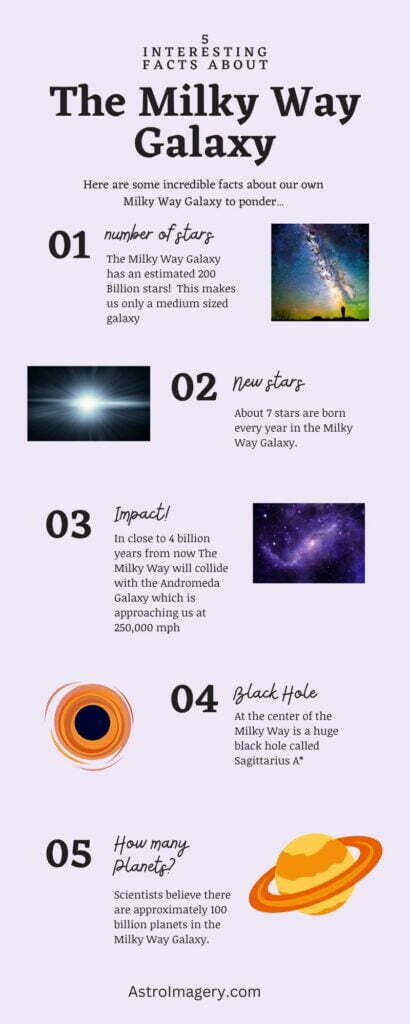
The Milky way consists of billions of stars, as Galileo first discovered in 1610 when he became the first person to see individual stars in his telescope (Combes and Lequeux, 2016).
It depends on where you are and how dark the skies are as to how clearly you can see the Milky Way. The clarity and darkness and the sky are measured on the Bortle system. At Bortle five which is moderate or suburban sky such as I have at home in the back garden, I can’t really see the Milky Way because of the light pollution around me and the local lighting. However, I have noticed that going to Bortle four or a bottle three sky I can begin to see a cloudy haze which tells me exactly where the Milky Way is.
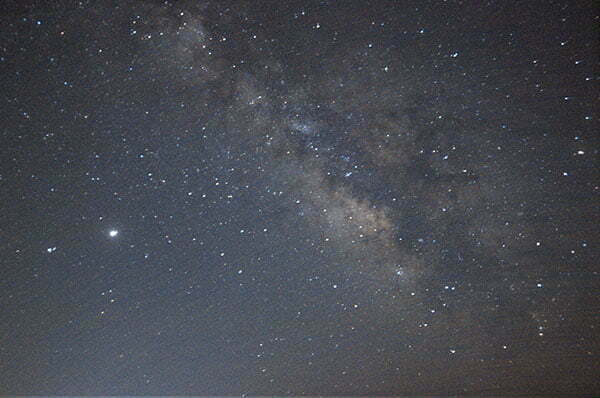
At Bortle three of four, there is still no colour to be seen, but you can at least understand where to aim your camera. I am told, because I haven’t yet been to a Bortle 2 or 1 sky yet, that you can see not only a lot more detail of the Milky Way but some colour too.
Where is the best place to go to get pictures of the Milky Way?
You want to get away from streetlamps and lights of the city and find a dark area at least Bortle 4 or less. There are a number of apps that you can use to find these areas of lower light pollution.
My house lies in a Bortle 5 zone and so I can see many stars. I am in a rural setting so the night sky is very nice. However, I have a Bortle 4 zone very close by and when I go there I can immediately see the Milky Way with my own eyes. This makes it much easier to photograph and lessens the negative effects of light pollution.
The best place to photograph the Milky Way is the darkest place that you can get to from where you live. You’ll also need to find some interesting features in the landscape that can help take your image to the next level.
When is the Milky Way season?
Milky Way season is during the summer months, especially from May to August, although it can be seen for many months longer than this. The Milky Way begins to rise and we see the core in summer. Here is a Milky Way calendar to plan the best times to observe the Milky Way.
To capture stunning photos of the Milky Way you need to plan how you will capture it and how it will look. The position in the sky is important. Will the Milky Way be close to the horizon and forming an arch or will it be towering up into the sky? Maybe you are aiming for a more elevated horizontal position?
Different times of the year as well as different times of the night will present different positions and orientations of the Milky Way which will create new and interesting designs that you can set against a suitable and contrasting backdrop.
The summer is where pictures of the Milky Way come into their own. The detail that you see with a full-frame camera is absolutely spectacular! We can also take pictures with a cropped frame camera, as I do, but there is less detail to be seen in these photographs. Early on in the Milky Way season, it’s possible to take nice pictures of a Milky Way arch above certain landscape features which can be really really amazing!
How to process your pictures of the Milky Way?
One thing I’ve learned in the time that I have been doing astrophotography is that taking pictures is only half of the problem. The care and creativity that you put into the image, and the effort that you put into your processing make your photograph truly unique. Your processing skills will definitely determine the outcome of your final image. One important processing skill is stretching an image using Photoshop or some other image editing program.
As I have gained experience in astrophotography I can see how important the post-processing stage is and adds the photographer’s unique style to the image.
Also, as my post-processing skills have improved, I can now almost eliminate the negative effects of gradients of light coming from sources of light pollution. I can also enhance my photo to make it much sharper and more professional looking.
When I take a look at my earliest photos of the milk away I can clearly see that my data was fine but the processing skills that I applied and the software that I used could have been improved. In fact, I am now going over some of these photographs and reprocessing them. Hopefully, you can see a big difference with the same data being processed with more successful results now.
How important is the background or landscape in Milky Way pictures?
learning how to photograph the Milky Way was so exciting that I got quite carried away with the whole experience! I processed the images and was very very proud and amazed that I took these wonderful pictures of the Milky Way.
As I look at these pictures now with a bit more experience, I can see that just taking the Milky Way in the sky can be quite boring as a composition. To go to the next level you need to engage the viewer with a wonderful composition, by adding intriguing landscape features. This can add to the mystery and awe of your photography and enchant your viewer.
Natural features such as rocks, arches and imposing natural and artificial features can add perspective and help to frame the Milky Way adding interest and personality to your image.
If you look at professionals and very experienced astrophotographers and their photographs of the Milky Way you can see that they really use landscape features like trees, rocks, and vegetation to really bring out and highlight the features of the Milky Way in their stunning photographs.
Where can I see some excellent examples of Milky Way photography?
There are many examples of wonderful pictures and photographs of the Milky Way online and in books. One astrophotographer I like, who has wonderful compositions of the Milky Way that really pop, is a guy from Wales who lives in Turkey called Alyn Wallace. I recommend you go take a look at his videos on YouTube.
One book I really recommend is a book written by Adam Woodworth, called “Night Sky Photography: Form First Principles to Professional Results“. This book not only guides you in photographing the Milky Way, it will improve your skill as a night sky photographer and help you to appreciate the art of space photography.
For a look at some of the best examples of Milky Way astrophotography images, take a look at this page where you can find pictures taken by the Best Milky Way astrophotographers of 2023, according to the Capture the Atlas travel blog, according to The Guardian.
I hope that this page has inspired you to go find some dark skies, get some basic equipment, take a tripod with you and point them at the sky and try and take your first images of the Milky Way. They may not be the most professional photographs, but I’m sure they will give you an immense amount of satisfaction and will set you on a similar journey to mine into the world of astrophotography and capture the wonders of our galaxy, the Milky Way.
References
Combes, F., & Lequeux, J. (2016). The milky way: structure, dynamics, formation and evolution. EDP sciences.
‘Photographing the Milky Way’ (1994) Astronomy, 22(3), 81
Redfern, G. I. (2018). The Milky Way and Other Galaxies. In Cruise Ship Astronomy and Astrophotography (pp. 111-131). Springer, Cham.


