
It’s difficult to know where to begin, especially when you start looking at astrophotography software that’s commonly used. I’ve found through the experience of starting this hobby and progressing through the last year that it is often necessary to try many software programs in order to figure out which ones you understand and like most. The experience that I have gone through over the last year can really help you if you are starting out in this exciting hobby.
There are many kinds of astrophotography software that can be used for different processes, such as imaging, stacking photo photos, processing photos, and telescope guiding, software that you can use with your telescope or DSLR camera. Some software makes your life a lot easier, such as that which helps you find targets in the night sky.
How do you go about choosing the right software?
Astrophotography software is a matter of practicality, ease of use, and personal taste. So just because I recommend a piece of software to you doesn’t mean that you should use this piece of software. I advise you to try it out, see if I’m right, see if you like it, and then decide whether you will use that program or look for an alternative.
Choosing astrophotography software also depends on the equipment you have; for example, the type of camera will change the way that you image your astrophotography target. The software that you need to help you take the images will help you organise, plan, and manage the photos that will become your final astronomy images.
In order to look at the different software that we use in astrophotography, it’s necessary to divide astrophotography into the different processes that you will need to carry out in order to go from finding a target to imaging it, processing it, and finally producing the final image that you are proud of.
Here is a quick list of some of the processes involved in astrophotography:
- Checking what astrophotography targets are in the sky and where they are
- Setting up your equipment may include polar alignment, star alignment, or both, depending on the type of mount you have.
- Setting up your camera (focus, centering your image, etc.)
- Pointing your telescope at the correct target
- Setting the length and number of exposures
- Tracking and/ or guiding to stay on your target
- Checking and stacking your images
- Post-processing your stacked image
Saving You Time
Any software that you use should help cut down on the time and effort that you require to move from one step to the next. The software will make a difference to your process and workflow and should make a difference to your final image.
Astrophotography is quite impossible without the use of appropriate software and tools. At least you will need to use basic software for your imaging process and your post-processing process, if nothing else. Read about astrophotography as a hobby and my experience so far.
Which Astrophotography Software Do You Need?
I’ll start this list of astrophotography software and tools that you can use by mentioning the many pieces of astrophotography software that I first tried. In some cases, I didn’t get on with the software or didn’t like the software for one reason or another and tried something else. The many hours that I’ve put into this will be a huge benefit to you if you take my advice.
First of all, let’s take a look at some of the programs I use at present. For finding and choosing astronomy targets in the night sky, I use Sky Safari on my iPhone. This is a wonderful app because it shows you the night sky, which you can move to any time you want, and you can basically point your phone at the night sky and identify what you see above you. If you also switch it to show deep-sky objects, you can identify where you can find nebulae, galaxies, and stars around you. This program I have found indispensable for planning and actually pointing my telescope in the right direction, especially in the early days of my journey into astrophotography.
Stellarium
Another program I like to use is called Stellarium. This program I have installed on my laptop, but you can also install it on an iPad, I believe. Stellarium is a great program because it shows you what is in the night sky and where it is and it also gives you a lot of information about a target just by clicking on it. So again, Stellarium is a great piece of astrophotography software that you can use to plan your night’s viewing or photography. You can also link Stellarium directly to your telescope to enable you to find targets and have your telescope slew automatically.
Other Tools to Try
So that’s finding targets to shoot; the next process that is necessary is actually aiming your telescope exactly at the target and framing it correctly. Before I used the Astrophotography Tool, I was wasting a lot of time moving the telescope slightly to find or move my Astro target. Sometimes I either couldn’t find the target or lost it completely, which meant I had to realign my scope and search again. Once or twice, I gave up after wasting an hour or two struggling to see a galaxy or nebula that may be very faint in the eyepiece.
Astrophotography Tool is my choice as the best astrophotography capture software I have used. I have been using it for a couple of years now and stick with it because it is easy to use and set up.
Click here to find out if you can see galaxies in the eyepiece of a telescope, I’m sure you’ll find my answer very helpful.
The Astronomy Tool contains a feature called plate-solving, which makes it quick and easy to locate and point at small targets in a huge sky! This feature alone is a game-changer!
NINA is another alternative that many prefer to use to do things such as live stacking and planning imaging sessions.
Once you are pointing exactly where you want to, you are ready to begin taking photographs. But you’ll need to set the exposure times and the number of images you’ll take.
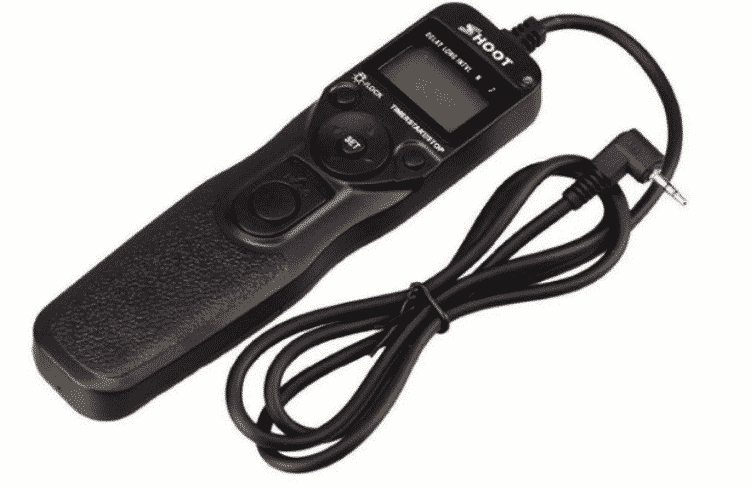
For this, I use an intervalometer connected to my camera. The intervalometer enables my Canon 600 D to be set to take a number of images automatically. I can set it to take, say, 100 images with an interval between each photo that I choose, and therefore I can control how my camera will take pictures for the night.
This is a semi-manual way to do this, so I do have to return to my camera every now and again to check how progress is going. There are a few pieces of astrophotography software that will run on your laptop or PC to do the same thing if you prefer, including the Astrophotography Tool which we have discussed earlier.
In terms of resources, you may wish to research new astrophotography software or alternatives to what you’re using and you can read the experience of the software on a forum called Cloudy Nights, which I’ve used over and over again. It’s a great source of ideas and there are very very helpful people there who can help you, especially if you’re a beginner in this hobby. If you’re intermediate the forum is also priceless. Be sure to go check it out!
What software do I need for Astrophotography?
Trying not to repeat what I’ve already said that there are a number of processes that you need to do in astrophotography before you get to your final image that require you to use the necessary software.
You cannot avoid using this software, but the choice you make will definitely make your life easier or more difficult.
In this section, we going to look at several different processes that are necessary for everybody trying to do astrophotography and these include finding your target, imaging your target, stacking your images, and post-processing your final stacked images into a final astrophotography image that you can be happy with.
There are a number of other things which will require you to use several tools, for example, depending on what kind of mount you use with your telescope or camera setup, you may require to do the polar alignment. This is necessary when you have an EQ, or what is known as an equatorial mount.
Polar alignment requires you to use some kind of tool. I found a very very nice app on my iPhone that tells me exactly where the Pole Star should be in my reticule of the polar telescope on my mount. This is an essential tool, which enables me to quickly polar align within five minutes.
Another tool you might use is there an actual physical piece of equipment called a Batanov mask or some kind of instrument that you used to place in front of your camera lens or telescope which enables you to focus precisely on a star before you start taking images. Again, astrophotography software exists to help you precisely focus on a star, but I find the manual methods mentioned sufficient.
If you do not make sure to use some kind of a tool to assist you in making precise focus before you take your images. Everything you do afterward will be a waste of time because the final image will be out of focus and look horrible.
Another tool you may have on your camera, which I would say is that is almost essential for astrophotography if you’re using a DSLR camera is live view. You will find it very helpful to have a live view on your camera because it enables you to see stars or whatever you’re pointing at with your camera so that you can adjust your framing and focus.
Without this feature on the DSLR camera, you will find it almost impossible to frame properly or to focus correctly. As mentioned before plate-solving can do this for you and several software plate-solving solutions are available including Sharpcap and Astrophotography Tool.
One of the biggest and most important processes, in fact, I would say it’s half the workload of producing any image, is post-processing of your photos.
Once you have a stacked image from however many photos you have taken, you need to process that image because you’ll find that once that stacked image is produced it will be pretty dark and it won’t have any visible details. Don’t be shocked about this if you’re a beginner, you’ll soon get to realize that it is necessary to bring out the details in post-processing of the picture because they are there.
When you use programs like Photoshop you will need special plug-ins which are add-ons such as Astrophotography Tools by Nick Carboni. These tools simplify your life enormously and the actions that you can use in the processing are much faster and easier to apply, and your final image will improve so much. So do some research into plug-ins if you do use a program like Photoshop, GIMP or Pixinsight.
You will need astrophotography software such as Photoshop or Pixinsight or some such program to stretch the image and bring out details in the photograph. Only after this process will your image begin to come alive with color and faint details.
Let’s move on now to what I consider some of the best software that I’ve found to be useful for astrophotography.
What is the best software for Astrophotography?
I’ve tried an awful lot of different astrophotography software on my laptop and subsequently given up on certain programs to replace them with better and quicker alternatives.
I must admit I did also upgrade my computer so that it was faster because, when I first tried using my laptop it couldn’t cope with programs like Photoshop. What I did was upgrade the RAM to 16 GB and change my hard drive to SSD. Now my laptop is relatively quick and doesn’t crash when using these larger programs like Photoshop and so on.
Programs I Recommend to You
The best program I have found for looking at the night sky, learning about the various targets, and where to find them is Sky Safari for the iPhone. You can probably find another app if you have a different smartphone. There are several different options. I think this app can really enhance your enjoyment while you’re under the stars and is very practical for navigating the night sky.
The best stacking program for astrophotography images I have found is Sequator. This is what I like most because it’s quick and easy to use for a beginner, you can add dark frames and It produces quite a nice image at the end of it. I also tried DSS (Deep Sky Stacker), Siril, and others, but prefer to use Sequator as it completes quite quickly compared to the others.

I experimented with other software to process the stacked image before using Photoshop and for a while, I used Siril to do background extraction and auto stretching before post-processing however now I would say that such a program is not necessary. After stacking in Sequator I process my final image in Photoshop.
Photoshop is my choice as the program I use for post-processing but there are a bunch of alternatives such as Pixinsight, but it is much more expensive and I believe it does take some time to learn so I haven’t really looked at that one. I have also looked at Startools, which I found a bit confusing and I really couldn’t get to grips with it. After trying a few other programs such as Astro Pixel Processor, I ended up using Photoshop because there are so many tutorials online and because luckily I’m able to access it free but it does normally carry a monthly charge.
Which is better Adobe Lightroom or Photoshop?
A lot of people discuss whether we should use Lightroom or Photoshop, which are both software from Adobe. Both can be used to process photos. Lightroom has fewer features than Photoshop, and I would advise that you can use both. Having tried Lightroom I didn’t see a need for it, I prefer Photoshop. It has many more tools and the only advantage of Lightroom is that you can organize your photos, however, I find I can do that satisfactorily by just putting my images in different folders anyway and storing them on an external hard drive.
I’ve also used Adobe Bridge and actually found that was quite good because again you can access and organize your images quite easily. The other thing which I found quite useful is how you can quickly scan through your images and check that they’re okay before you start stacking them.
Deleting photos that are out of focus, have moved, or contain some erratic light that ruins the picture is essential. So before stacking, make sure that you delete any pictures that you don’t need. Unfortunately, there is no astrophotography software that can do this automatically for you, you need to run your eyes over the pictures before you stack them.
This then brings us to the end of this brief summary of the kind of resources, software, and plug-ins that I have found most helpful. I hope this is useful to you as you try them out for yourself.
If you’d like to know more about Photoshop, this page shows how it can be used to process images, where to find resources and tutorials related to Photoshop, and which plug-ins I have found most useful.
Do You Have Any Questions?
I do hope that this page has been helpful to you, and if you have any questions, I’d love to hear from you please contact me, and also don’t forget to check me out on Instagram.


