
Table of Contents
In astronomy, deep-sky objects are those that are very far away from our planet and usually outside our galaxy. Deep-sky photography, therefore, involves the capture of distant galaxies, nebulae, and other astrophotography targets. There are literally thousands of these deep-sky objects available to anyone with the necessary equipment, and in my experience, this kind of astrophotography is challenging, exciting, and filled with many technical issues to overcome along the way.
So, if you’re interested in learning about the deep sky imaging techniques that I use or if you need help improving, check out my deep sky photography tips. We’ll also look at the best equipment for deep-sky photography that will help you take amazing pictures of space.
Before we get started, though, here’s a definition of deep space photography:
Deep sky photography targets are objects that are many light-years away. They can be seen in telescopes but are very faint. When photographed, nebulae, star clusters, and galaxies reveal their beauty, structure, and colour. Deep sky photography requires a telescope, camera, mount to track the stars, and software to process the images.
The universe is an enormous and amazing place. It’s full of stars, planets, and other celestial bodies. But it’s also full of mysteries that we’re still trying to figure out. Take a look at this page to find out about lenticular galaxies; they can be fascinating objects to photograph.
We’ve been looking up at the sky for centuries, but only in the last few decades have we been able to explore space with satellites and telescopes. And now, thanks to advances in technology, you can take amazing photos of space from your own backyard!
Here are my thoughts on the best telescope to use for astrophotography.
Deep Sky Imaging techniques
Everybody does astrophotography in a slightly different way, and this is obvious from the results that we get. No two astrophotographers, even if they use the same equipment and shoot the same target on the same night, will produce the same images.
Why? Because the deep-sky imaging techniques will change slightly from person to person, and there is also the creative post-processing of the data we capture. Here’s a short guide to post-processing astrophotography images.
Now let’s delve into the techniques of deep-sky photography.
Deep-sky photography requires long exposure times. Some objects, such as nebulae and galaxies, are so far away and so faint that they need to be photographed for hours before we can create a good-quality photograph.
One of the most important deep-sky photography techniques is to take many long-exposure photographs and stack them in computer software later. In order to take long exposure shots of our deep sky object, we need to either use a shutter release that can be programmed (if you are using a DSLR camera) or use software to control your dedicated astronomy camera.

- For Canon EOS 5D, 5D Mark II, 5D Mark III, 6D, 7D, 7D Mark II
- Under $40 (price may change)
- 4.5 stars with 1,799 reviews on Amazon
- Great value!
So how long should your exposure be? The most important answer to this is that it is the total exposure time that matters most. I first tried to create images of deep-sky objects with one to three hours of total exposure (also called integration time). Now I am not really satisfied unless I collect five to ten hours at least, and sometimes, depending on the target, even more.
Check out more information about taking long exposures for night photography and use this long exposure calculator I created to calculate how long both your individual exposures should be and how many of them you should take to get the best quality astrophotography image possible.
Other deep-sky imaging techniques you need to use depend on the equipment you use. If you use a DSLR camera, you’ll need to modify it to maximise its hydrogen alpha sensitivity. You’ll also need to use the correct filter. You can choose a light pollution filter, a narrowband filter, or an RGB filter. There are many such filters on the market, and choosing the correct filter for your conditions and target is important. Check out this page about astrophotography filters if you need more information.

- Hydrogen-alpha filter for nebulae
- Low 7nm pass
- Blocks light pollution
- Give your images punch!
In a nutshell, you want to use filters if you have too much light pollution, and narrowband filters are good for emission nebulae, whereas RGB filters are more suitable for reflection nebulae or galaxies.
If you use a telescope for your deep-sky imaging, you’ll need to pay attention to how you attach your camera, and your focus must be very good.
Let me warn you about some of the problems I’ve had with focusing my telescope. You need to make sure to really tighten down your focus, as it can drift with changing temperatures during the night. I lost several nights’ photos when I was new to astro because my focus was so bad the pictures were spoiled. The stars were not pinpoints; they were more like blurry eggs! You don’t want that.
I think this is enough for now about general deep-sky imaging techniques. Let’s talk about photographing galaxies.
How to photograph galaxies
My first efforts at photographing galaxies came when I tried to capture the Andromeda Galaxy. I remember how stunned I was when I first realised that I was seeing my very first galaxy in my telescope! But photographing it was another challenge altogether!
So how do we photograph galaxies? What techniques do we need to do this well?
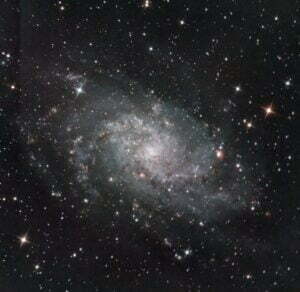
First, you need to understand how far away these faint objects are. You probably won’t see hardly anything in your telescope eyepiece, and even in one exposure, it will look like a grey smudge. Very disappointing.
Find out more about what telescope will allow you to see galaxies.
Some of the more commonly photographed galaxies are many millions of light years away! You’ll need to take many long exposures, for sure.
Use an RGB filter, or if you try photographing them from a dark sky, don’t use any filter. That way, you’ll not block any light coming from the galaxy.
Another imaging technique you can try is to combine narrowband or hydrogen alpha data taken with a suitable filter with RGB data. The highlights you’ll get from the HA data will make the image stand out.
One of the most important things to remember when taking images of galaxies is that they are generally small, so the bigger the telescope and field of view, the better details you’ll get. Get as much exposure time as you can, and you’ll get great results with practice.

- 10-inch large aperture
- Quality optics
- Very sturdy mount
- Approx. $765 (may increase)
Again, when photographing galaxies, focus needs to be spot on, or your image will lack details.
A Few Examples Of My Deep Sky Photography
Since I started astrophotography in the summer of 2020, I have managed to capture a lot of deep sky photography targets, and here are some of my favourite photographs that I’ve taken so far in less than two years after entering this hobby as a beginner.
The Horsehead and Flame Nebula in Orion
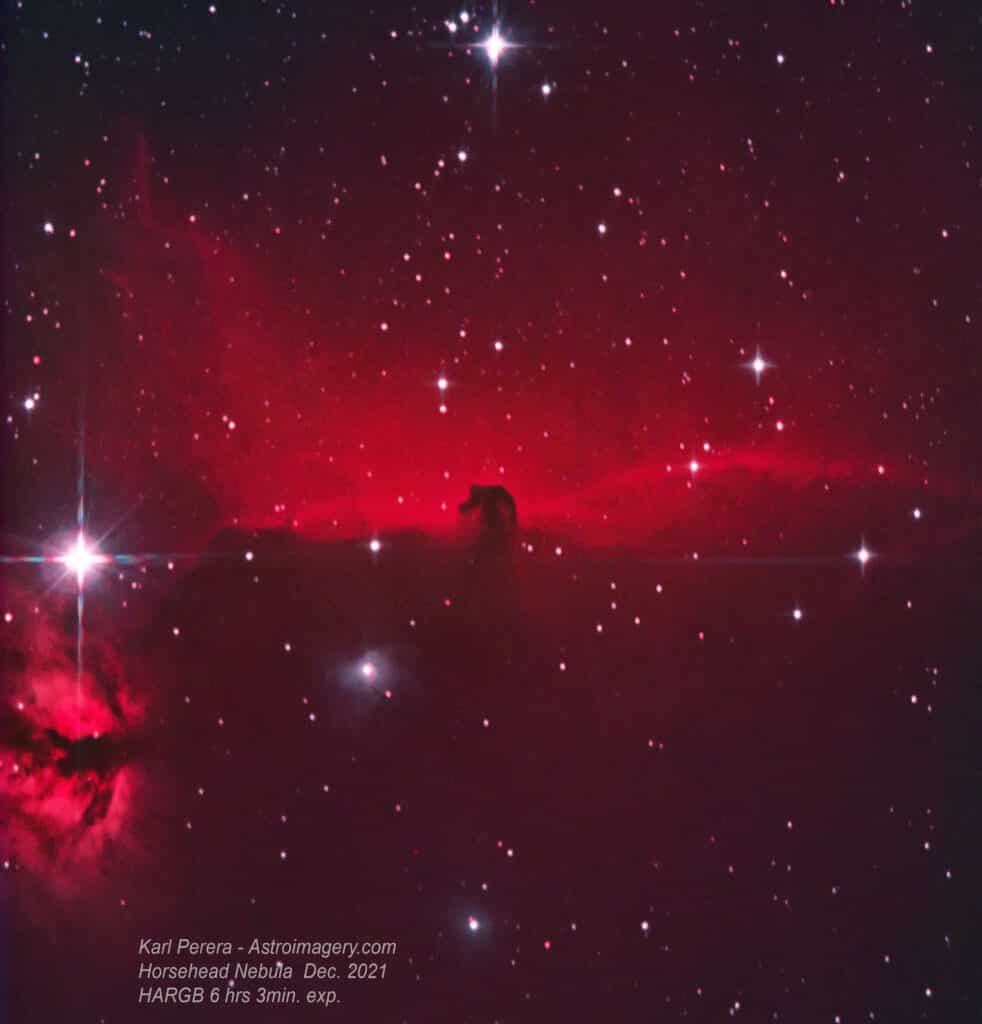
The Horsehead Nebula is stunning, isn’t it? It may be one of my favourite deep-sky photography targets in the night sky. It is only possible to photograph this during periods when Orion is in the night sky. In the Northern Hemisphere, this is during the winter and spring. The Horsehead Nebula is also referred to as Barnard 33 and lies about 1500 light years away from us. This means that although I took the above photograph in 2021, you are seeing how it looked 1500 years ago (i.e., in approximately AD. 521!)
I took this image during the longer nights of winter under a Bortle 5 sky using a Canon 600D DSLR astrophotography-modified camera. To modify a DSLR for astrophotography, the filters in front of the sensor are removed to allow more hydrogen alpha signal, which is necessary for higher-quality astrophotos.
I also used my Celestron 130slt reflector telescope on an equatorial mount, the ioptron CEM26. This allowed me to track the object and take images every three minutes of exposure. For this target, I combined the following:
61 x 3-minute RGB images at ISO 800 with an SVBONY CLS filter.
53 x 3-minute Hydrogen Alpha at ISO 800 with an Astronomik 12nm HA filter.
The RGB and HA images were stacked using Sequator to create a HA image and an RGB image, which were combined and processed in Photoshop.
If you are interested in the workflow and method I followed for processing a HARGB image, please watch this video by Tadej Skofic.
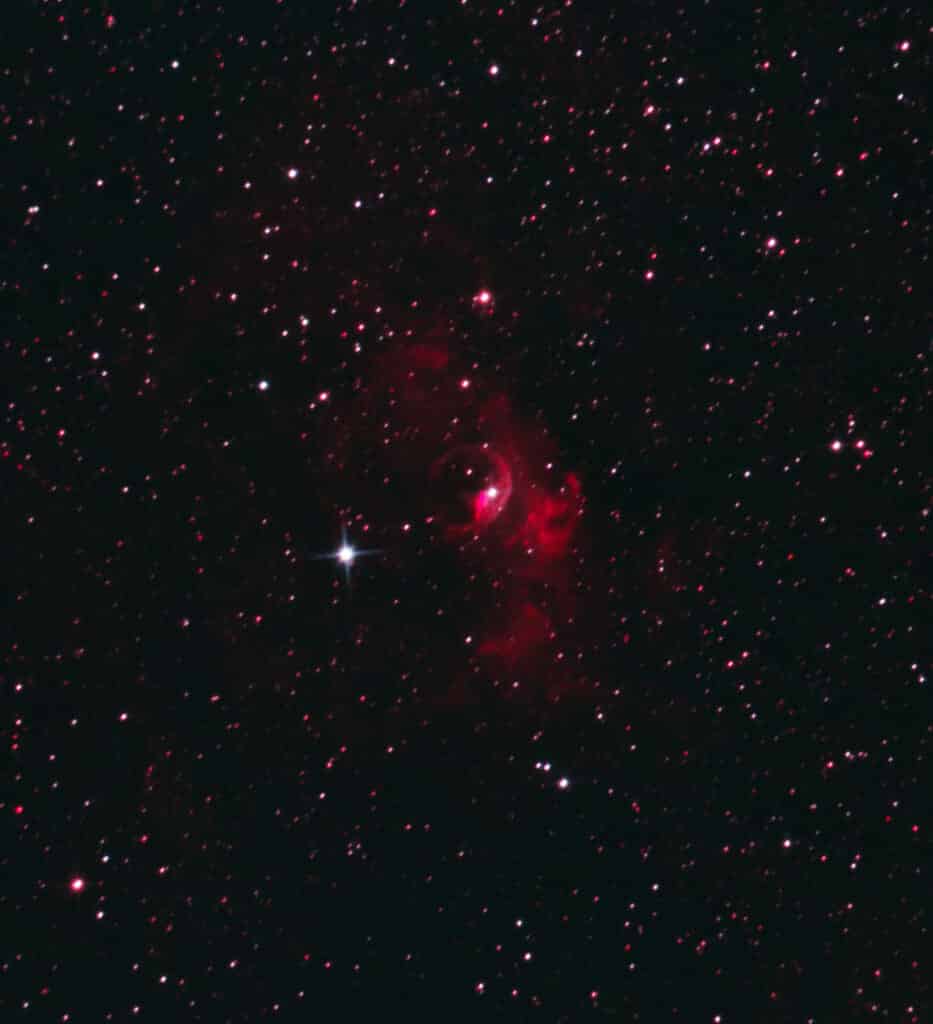
Take a look at other images of deep-space objects I have taken so far, including Markarian’s Chain. Perhaps at this point, you might be wondering if you can start astrophotography without spending too much. This guide I’ve written is just for you and answers how you can start astrophotography on a tight budget.
The Best Equipment for Deep Sky Photography
What are the best cameras for deep sky photography?
The best cameras for deep-sky photography are those that can capture the most light. This is because the stars in the sky are so far away that they appear as tiny points of light. The more light a camera can capture, the more detail it will be able to show in these stars.
Generally, there are two kinds of cameras used for deep-sky photography: DSLRs and dedicated astronomy cameras. I began by using a Canon 600D DSLR and now prefer my ZWO ASI533 MCPRO one shot colour camera.
Once you have chosen your camera and telescope, you should connect them to one of the best free software programmes out there so you can image easily. I use the Astrophotography Tool, and I suggest you try it.
DSLRs can be used without a laptop, but dedicated astronomy cameras cannot. I have written this short guide to explain that if you need to use a computer for astrophotography, go check it out.

- TEC cooled camera
- 11.7 MP CMOS
- With WIFI
- Minimizes noise
- Great value approx. $730 (price may change)
What are the best lenses for deep sky photography?
The best lenses for deep-sky photography are those that have a wide aperture. This is because the wider the aperture, the more light can enter the lens and reach the sensor. The more light that reaches the sensor, the better your image will be. Each lens will give you an F number; for example, one of the lenses I use is the Samyang 135mm, which is F 2.0 at its maximum setting.
This is another great choice of DSLR lens:

- Very fast (F1.8)
- Also available for Nikon, Sigma, and Pentax
- Amazon choice
- over 3300 reviews
How Do You Choose the Right Mounting System for Your Telescope?
Mounting systems are the most important part of your setup for deep-sky photography. They are what allow you to attach your camera or telescope to a tripod. For serious deep-sky photography, we need to track the stars, and this is why most astrophotographers use either an ALT-AZ or a more complex Equatorial mount.
Deep-sky photography with just a tripod is possible but limits you to a very short exposure of seconds, whereas a sophisticated equatorial mount can push this to several minutes. On top of this, for really detailed photos, it is possible to use a guide scope to extend the exposure time beyond two to three minutes to 10 or 20 minutes or more.
When I used my first mount, a Celestron AZ Alt mount, I was able to take photos of up to 30 seconds each before I saw star trails. With my ioptron CEM26 equatorial mount, I can easily take exposures of 3 or four minutes, even though I may have to reject about 10% of these due to the movement of the mount. This does, however, depend on the accuracy of polar alignment, which is necessary with an equatorial mount.
How Do You Choose the Right Filters & Optics for Your Camera?
For shooting deep-sky photography, you may need to use various filters.
My sky is not bad, but it suffers from light pollution, as do most skies. I live in a Bortle 5 area. This is enough to cause problems if you shoot longer exposures, as the sky will be overexposed, which will hide the details of the deep sky object you are shooting. A light pollution filter will usually help to make the sky darker and easier to process after you have stacked your images.
I have tried a few different light pollution filters, including an SVBONY CLS and an Optolong L Pro Max. They are both good, and I particularly like the clip-in versions for my DSLR camera.
For deep-sky objects with a lot of red colour in the nebula, I have used an Astronomik 12nm HA filter to shoot the image in just hydrogen alpha. This is a good idea because it can be done even when the moon is bright, as this filter doesn’t allow so much of the regular light, including the glow of light pollution or moonlight, to pass through to the sensor of the camera. Great photos, such as the above one I took of the Horsehead Nebula, can be created by combining HA with the RGB colour data, and the results are far more detailed than just colour alone.
Deep Sky Photography Tips
I am still developing the techniques I use and gaining experience with astrophotography, and it seems to me that the images I can achieve are getting better each time I try. Taking photos of space is a pleasure that comes from time, practice, and a slow understanding of both the object you are photographing and the equipment you are using.
Here are some of my best deep sky photography tips:
- Use a Bahtinov mask to get accurate focus, and check this before each imaging session. During the night, I also make sure that my focus is good on the images I have taken. Don’t lose a whole night because you didn’t check your photos from time to time. I’ve done that, and it doesn’t feel good.
- You can 3D print a Bahtinov mask, as I did, and this saved time and money. I didn’t need to order one online and knew someone with a 3D printer. It worked out well, and I still use the mask each night.
- Check where the moon will be during the night and select a target that is not too close to the moon if it is more than 60% full. Make sure to use a filter, as a bright moon is a form of light pollution.
- Be sure to collimate your reflector telescope before imaging, as it will improve your image quality.
- Check the balance of your mount, as this may affect your guiding and the sharpness of your stars.
- Polar align accurately, as this can affect the tracking of your mount.
- Check that everything is running smoothly at regular periods through the night.
- Be careful that none of your cables can snag. I don’t know how many times my equipment has snagged, and I’ve had to move fast! It can ruin many hours of images if this happens when you’re not there to stop it.
I am sure that these deep sky imaging tips will help you, but if I’ve missed any, please let me know!
There you go, I hope this page helps you improve your deep sky photography skills! Clear skies to you!


