Table of Contents
The Pleiades Star Cluster is a famous and stunning deep-sky target for any astrophotographer. The Seven Sisters, also known as Messier 45, can easily be seen with the naked eye if you know where to look. Photographing it is also very easy, but there is one major challenge: capturing the amazing blue nebulosity that surrounds these stars.
In this post, I will show you how to capture this astrophotography target and give you some indication of how you can expect your photos to turn out as you progress in this hobby. There is no substitute for experience, but my aim here is to show you my results and help you capture better photos by learning from my mistakes.
About the Pleiades Star Cluster, M 45
The Pleiades, also known as M45, is an open star cluster located in the constellation Taurus. It contains over 1,000 stars, including several bright blue stars that are visible to the naked eye. The cluster is relatively young, with an estimated age of 100 million years, and is located approximately 440 light years away from Earth. It is one of the nearest and brightest star clusters, making it a popular target for amateur and professional astronomers alike.
One of the most striking features of the Pleiades Star Cluster is its nebulosity, or the hazy, cloudy appearance of the stars caused by the reflection of light from nearby interstellar dust.
This star cluster is also sometimes referred to as the 7 Sisters constellation, as there are seven major stars. This object has been seen since ancient times and there are even cases of the Pleiades being mentioned in the Bible.
The Pleiades star names include Sterope, Merope, Electra, Maia, Taygete, Celaeno, and Alcyone, which were names of nymphs in Greek Mythology.
Read more about the Pleiades myth (also known as the legend of the seven sisters)
The Pleiades is an open star cluster, meaning that it is not held together by a strong gravitational force. The stars stay together only because of their similar movements in relation to other celestial objects.
We can see the Pleiades star cluster with the naked eye because it is quite close to our planet, one of the closest of all the star clusters we know of.
When to Image the Pleiades
If you’re interested in capturing the beauty of the Pleiades star cluster for yourself, it’s best to observe the cluster during the winter months when it is high in the sky. There are two ways to photograph this deep sky object, either with a DSLR with a wide-field or telephoto lens or with a telescope and camera.
I notice that where I am in the Northern Hemisphere, I start to see the Pleiades come up above the horizon from about September 1 quite late in the evening, say after eleven O’clock or so, and then it gradually rises earlier. By January, Pleiades is well into the higher elevations of the sky, and the advantage here is that we can image it right up in the darkest part of the sky, including as it moves through the zenith.
In the Southern Hemisphere, the Pleiades can best be seen during the summer months.
Personally, Pleiades is one of my favourite targets that I return to each year, and with better skill at imaging, processing of images, and better equipment, I seem to do better as each year passes. Maybe one day I will be satisfied with my results!
If you’d like to learn how to process astroimages using Photoshop, as I do, then this is for you:
How Was Pleiades Given Its Name?
Have you wondered about this interesting name? I have. Well, it apparently comes from the Greeks, although there are different theories as to exactly how it got this name. Probably the most well-known theory is that the Greeks named the Seven Stars the Seven Sisters because Atlas and Pleione had seven daughters, and the stars are named after these daughters.
In Greek Mythology, Zeus changed the daughters into the form of stars, and so their names have been given to each of the seven major stars, (Alcyone, Electra, Maia, Merope, Taygete, Celaeno, and Sterope).
Also, ancient sailors used Pleiades as a navigational tool, and the name “to sail” in Greek was used (plein). Astronomers have used the term Pleiades ever since.
This amazing star cluster can also look great as part of a composition in landscape astrophotography.
What Causes the Nebulosity of the Pleiades?
The nebulosity, or hazy, cloudy appearance of the stars in the Pleiades star cluster, is caused by the reflection of light from nearby interstellar dust. This dust reflects the light from the stars themselves, which appears to us as a blue colour. This is a characteristic of the stars.
The dust particles are made of silicates and are very small, around 0.1 microns in size. This small size scatters the light in all directions, and this effect is seen as the nebulosity around the stars of the cluster.
In astronomy, there are two main types of nebulae, reflection, and emission. The Pleiades is a reflection nebula. This is important for astrophotographers because using the wrong filter to photograph Messier 45 can cut out some of the light we are trying to capture. For reflection nebula, broadband filters such as the one I have, Ioptron’s L-Pro, can be used, but many claim that these will block out some of this nebulosity.
Most nebulae are emission nebulae and emit a high proportion of hydrogen alpha, which often appears red in our images. For these, we can use narrowband or broadband filters.
Notes about Imaging the Seven Sisters
Before I show you what images I have obtained of the Pleiades Star Cluster so far, I’d like to offer a few tips on how best to image this target.
First, as with most deep sky targets, the longer the exposure time, the better for capturing faint nebulosity. However, as I have discovered and as you can see in the images below, the stars of the Pleiades are extremely bright and will easily be overexposed if you take long exposures.
In my attempts, once I started using an equatorial mount, I found I could take long exposures of two or three minutes without significant star trails ,so my images were taken with 2-minute exposures. This was my limit with my mount, the Ioptron CEM 26, without guiding.
Here’s a guide on how to choose a telescope mount so that you can image deep sky objects at longer exposures.
Even this appears to have overexposed the stars, so in the future, I think I would reduce this to 90 or even 60 seconds and get more images. You need to figure out how long your exposures will need to be for your light pollution, equipment, and so on.
To capture the nebulosity properly, try either a broadband light pollution filter or, if you want to get the best results, try no filter and reduce your exposure time. Take at least a few hours of total integration time.
To photograph the Pleiades, a camera with manual settings and a tripod are required. A fast lens, ideally with a wide aperture of f/2.8 or lower, is also recommended to capture as much light as possible. I used a Samyang 135mm, which meets these criteria, and got reasonably good results.
To get a good image, try to avoid too much light pollution. I have imaged it under Bortle 5, 4, and 3 skies and have managed to avoid any light pollution near the star cluster. You also want to avoid a bright Moon because that will impact the contrast in your image and remove your ability to see the nebulosity.
Good luck with your attempts! I’d love to know what success you get photographing the Pleiades.
My Photographs of The Pleiades Star Cluster
Here are some examples of the astrophotos I’ve taken over the last couple of years, and I hope you can see how, in astrophotography, experience, knowledge, and testing along the way lead to improved results. I hope to add another image or two to this as I am still trying to fully capture the amazing blue nebulosity around the Pleiades star cluster (M 45).
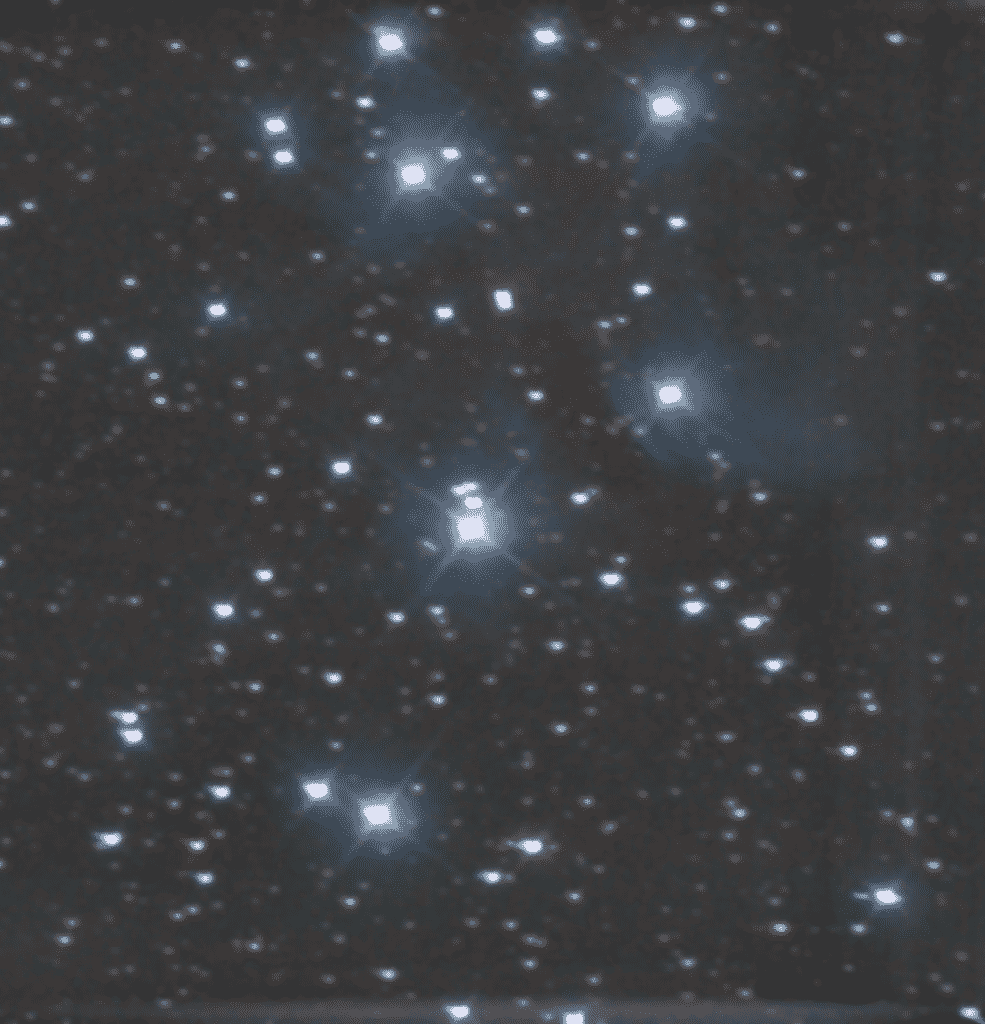
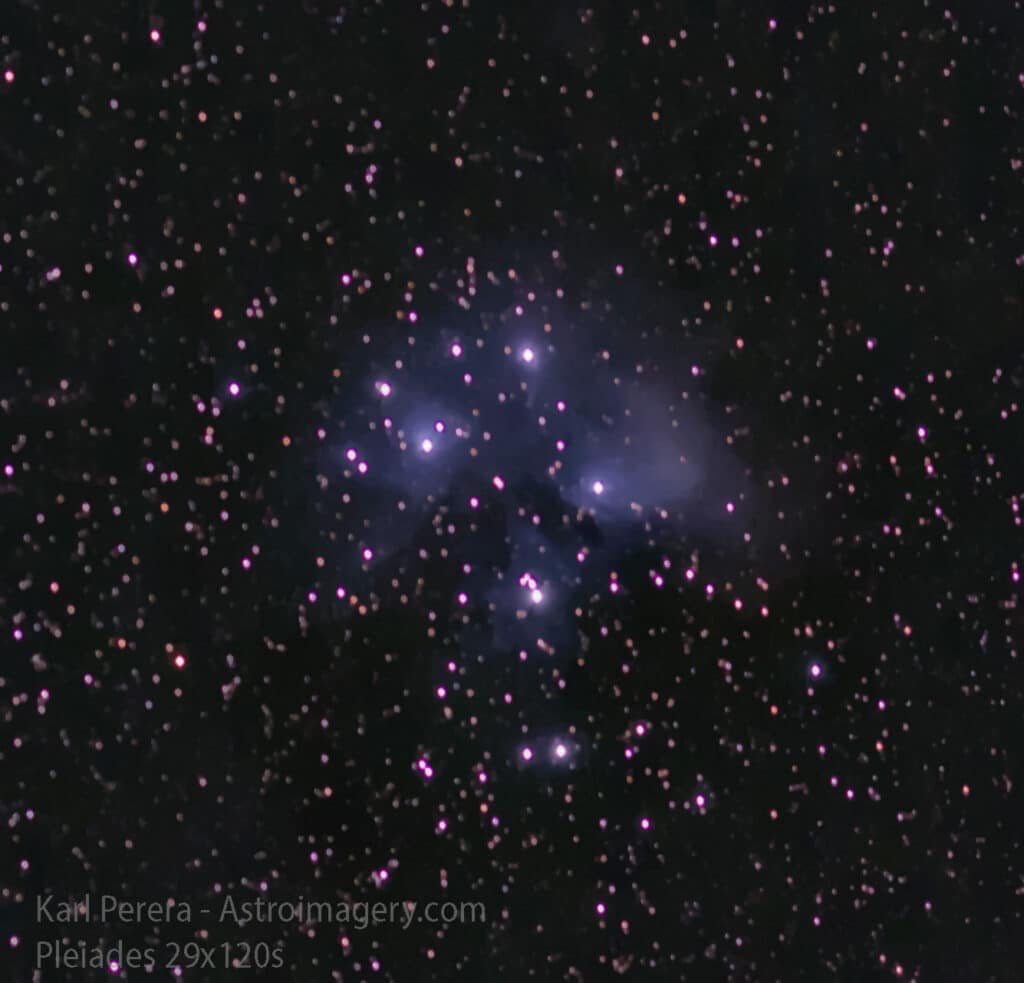
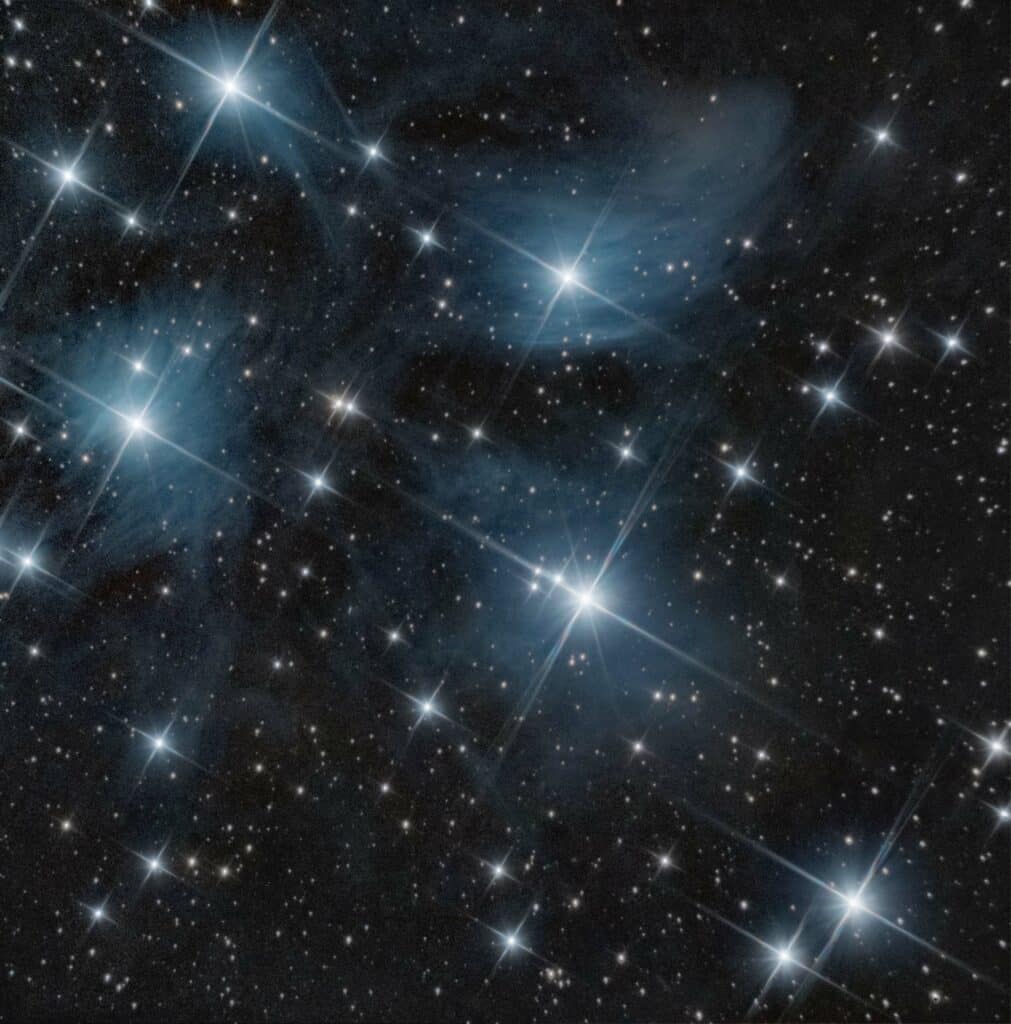
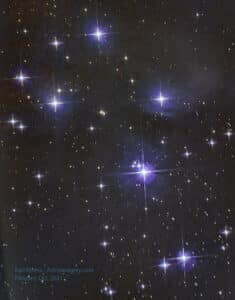
The Images of the Pleiades Star Cluster Above
Here are the exposure details of the images I have taken of the Pleiades (M 45), above:
Image 1
- Taken with the alt-az mount of the Celestron 130slt. L-Pro Ioptron filter. Processed in Siril. The field of view was 650mm.
- The number of exposures: 58
- Length of each exposure: 60 seconds.
- Total integration time: 58 minutes.
Image 2
- Taken with an Ioptron CEM 26 equatorial mount using a Canon 600D modified DSLR with a Samyang 135mm lens. This produced a wide-field shot of the Pleiades Cluster.
- L-Pro Ioptron filter.
- The number of exposures: 29
- Length of each exposure: 120 seconds.
- Total integration time: 58 minutes.
Image 3
- Taken with an Ioptron CEM 26 equatorial mount and a Celestron 130 SLT telescope. The camera used was the ZWO ASI533 MC PRO, which has a smaller field of view than image 1.
- The number of exposures: 97
- Length of each exposure: 180 seconds.
- Total integration time: 5 hours.
Image 4
- Taken with an Ioptron CEM 26 equatorial mount and a Celestron 130 SLT telescope. The camera used was a Canon 600D Astro-modified DSLR attached directly to the focuser of the telescope.
- The number of exposures: 200
- Length of each exposure: 180 seconds.
- Total integration time: 10 hours.
Conclusions:
Image 3 was taken with a more sensitive dedicated astro camera and not a DSLR as in Image 1. The equatorial mount has made a huge difference to the quality of the image also, making the stars and the details much sharper.
Image 3 also really benefits from guiding. In the third image, we can see much more nebulosity in the Pleiades Star Cluster M 45.
The third image also has a much longer integration, which makes it less noisy and more detailed.
Image 4 has twice as much integration as Image 3, however, it was also taken a year earlier than Image 3. Image 4 was taken with my Canon DSLR, whereas Image 3 was taken with the ZWO ASI533 MC PRO. The dedicated astrocamera, therefore, greatly improved the image.
Check out my post about how different cameras can affect your astrophotography and whether you need a special camera to get better pictures.
Next time I image this target, I hope to capture even more of the nebulosity by removing the filter and reducing the exposure time to compensate for the added light pollution that may enter the camera. We’ll see if that will enable me to capture all the glory of the Seven Sister’s blue nebulosity. Here’s hoping!
The Pleiades is a must-photograph astrophotography target, but it is not easy to photograph well. Have a go and keep trying, and one day you’ll capture it in all its beauty. Remember what they say, aim for the stars!
